Vegan Cherry pie

An Amateur Cook – Save Recipe

Save this recipe!

Get this recipe sent to your inbox, plus
new home-style recipes from An Amateur Cook every week.

This pie came from one of those days where I just wanted to bake something… not because I needed dessert, but because I needed the process.

You know those days? Where you don’t want anything complicated, just something you can take your time with.

I had cherries. A lot of cherries. And honestly, I almost didn’t use them because pitting them felt like a commitment I wasn’t ready for.

But I started anyway.

One cherry at a time, a little patience, a little mess. And somewhere in between rolling the dough and watching that filling thicken on the stove, the whole thing started to feel kind of calming.

When it came out of the oven, golden and bubbling at the edges, I didn’t even cut into it right away. I just stood there for a second, letting it cool, feeling like I’d actually made something worth waiting for.

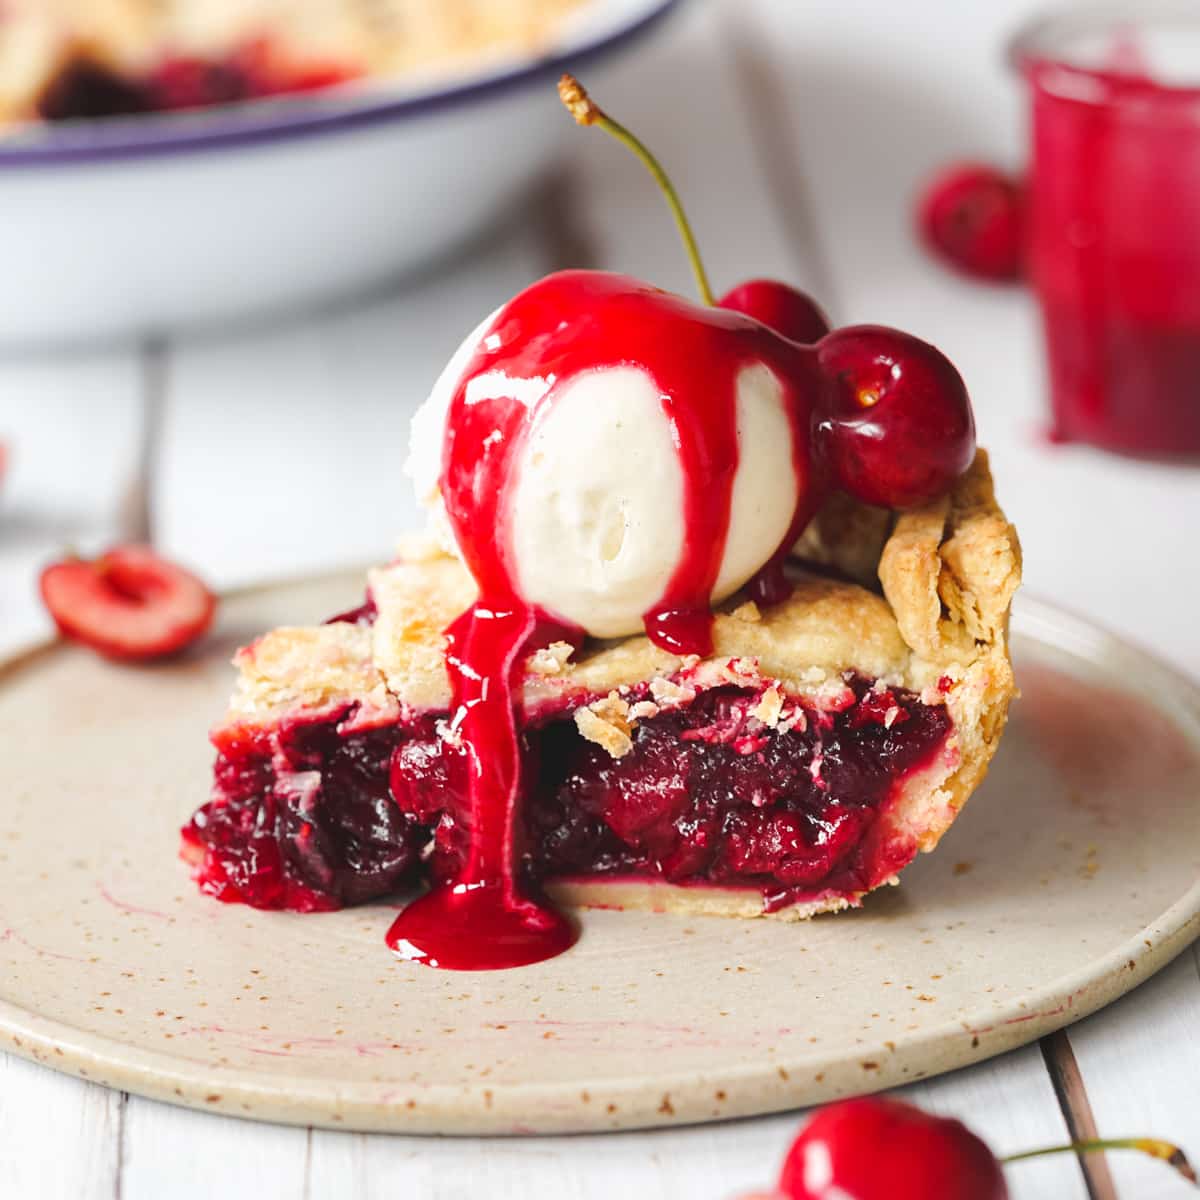
And that first slice? Sweet, a little tart, soft fruit with that flaky crust… yeah, this one stayed.

Why I Keep Coming Back to It

  • That Sweet-Tart Balance: The cherries bring just enough tang to keep things from being overly sweet.
  • Homemade Feels Different: There’s something about baking a pie from scratch that just hits differently.
  • Juicy, Jammy Filling: It’s thick, glossy, and exactly what you want from a fruit pie.
  • Flaky Crust Moment: That crisp, golden top is honestly half the reason I make it.
  • Perfect for Sharing: Or pretending to share, depending on the day.
  • Comfort in Every Slice: It’s one of those desserts that just feels familiar and warm.
  • Worth the Effort: Even with the prep, I never regret making it.

Real-Life Cooking Notes from Ethan

  1. Whole Cherries Work Better: I tried cutting them once, and it just wasn’t the same texture.
  2. Let the Filling Sit: Giving it time helps release juices and build flavor.
  3. Don’t Skip Thickening Step: Cooking the juices first makes a huge difference.
  4. Cool the Filling Before Assembling: Hot filling can mess with the crust.
  5. Don’t Stretch the Dough: It shrinks back when baked. Learned that the annoying way.
  6. Vent the Top Crust: Those little slits matter more than you think.
  7. Let It Chill Before Cutting: This one takes patience. It sets better and slices cleaner.
  8. Expect Some Mess: A little bubbling over is part of the charm.

Ingredients You’ll Need

  1. Vegan Pie Crust: 1 batch (prepared ahead)
  2. Cherries (Pitted): 600 g
  3. Granulated Sugar: 150 g
  4. Cornstarch: 40 g
  5. Lemon Juice: 1 tablespoon
  6. Vanilla Extract: 1 tablespoon
  7. Vegan Butter: 2 tablespoons

How It Comes Together

Prepare the Crust: Make and chill the pie dough ahead of time.

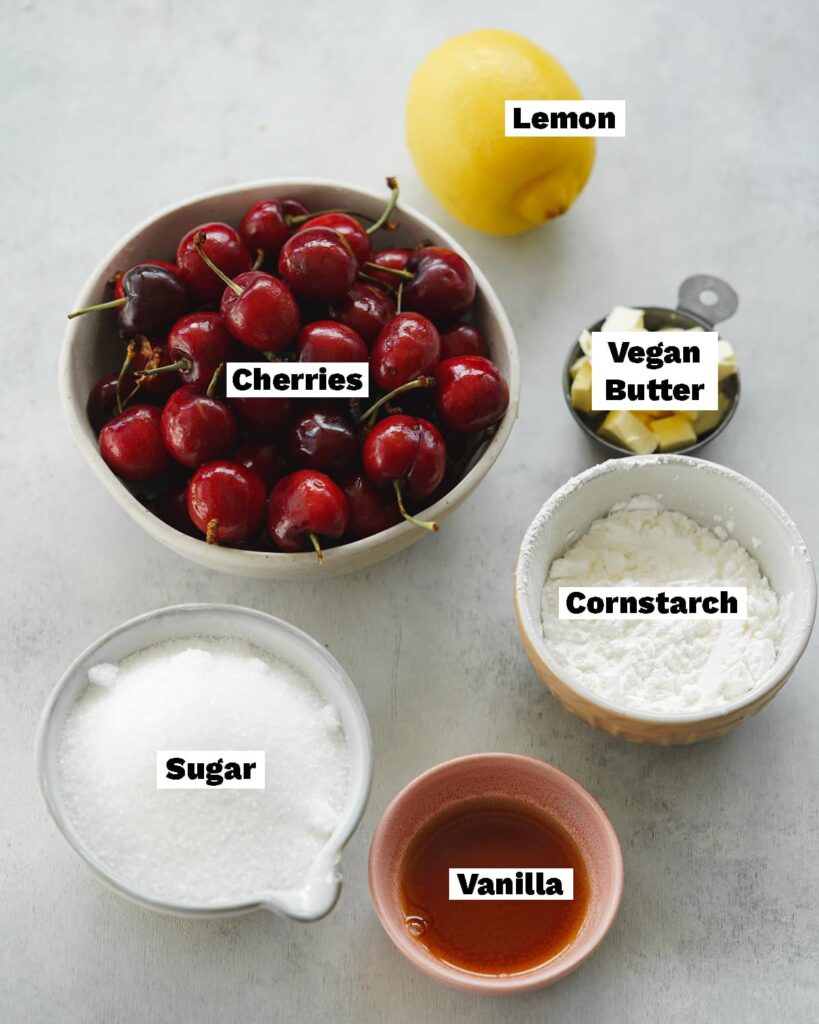
Make the Filling: Toss cherries with sugar, cornstarch, lemon juice, and vanilla.

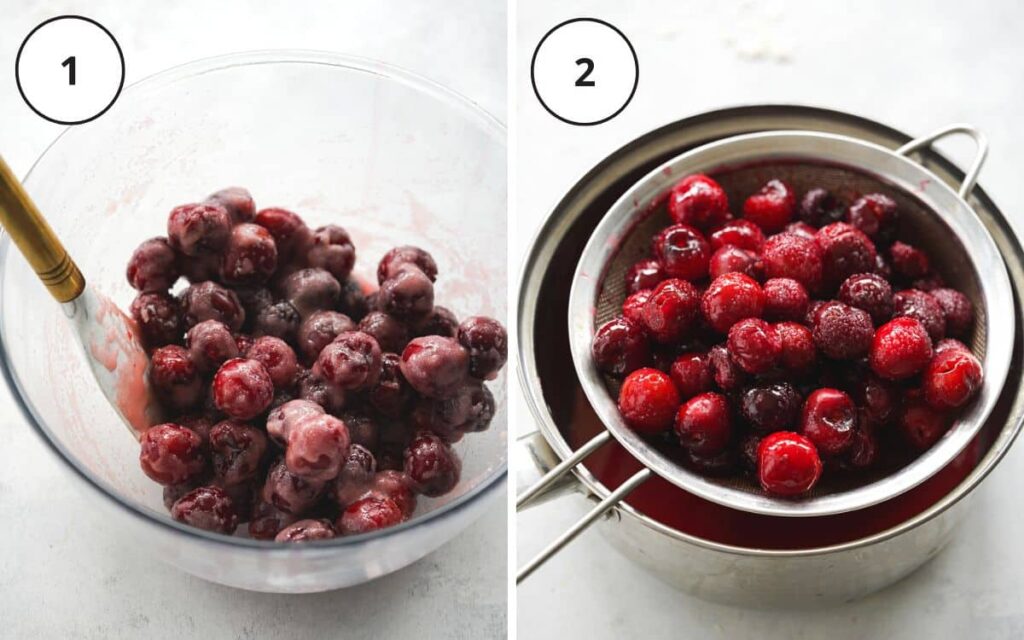
Cook the Juices: Simmer the released juices until thickened, then mix back with cherries.

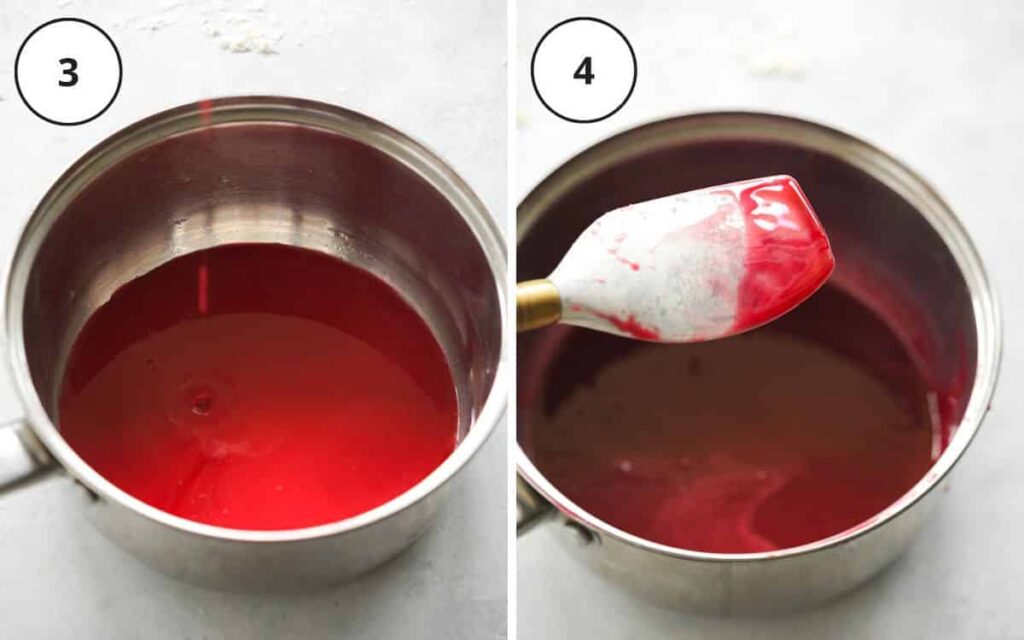
Cool the Filling: Let it rest before adding to the crust.

Roll the Dough: Fit one layer into your pie dish.

Add Filling: Pour in the cherry mixture evenly.

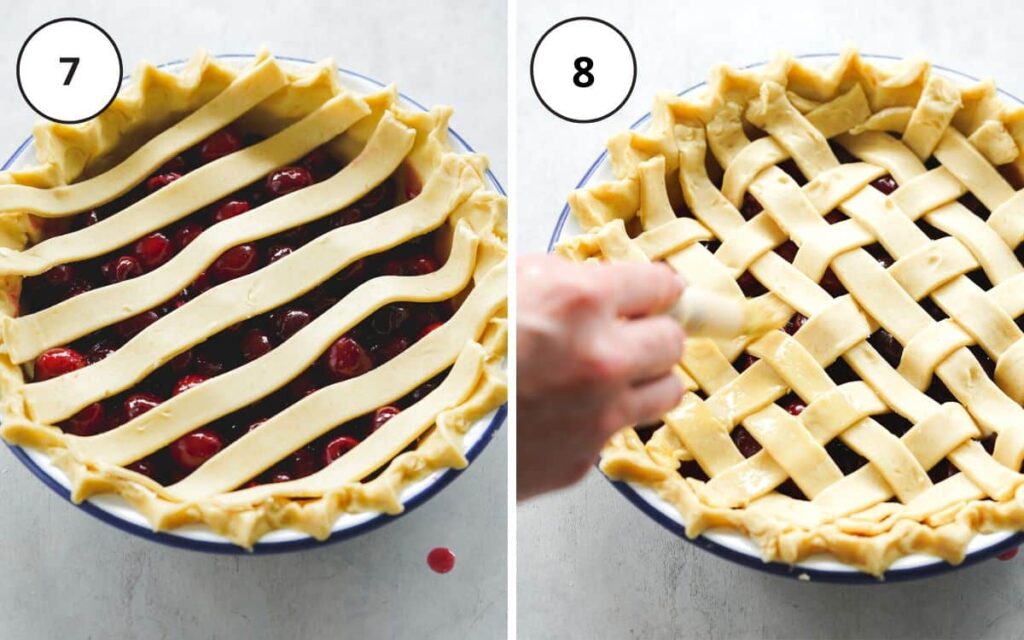
Top the Pie: Add a full crust or lattice and seal the edges.

Bake: Start at high heat, then reduce and bake until golden.

Variations You Will Enjoy Trying

  • Mixed Berry Version: Combine cherries with blueberries or raspberries.
  • Almond Twist: Add a hint of almond extract for a deeper flavor.
  • Crumble Top: Swap the top crust for a crumb topping.
  • Extra Tangy: Add a bit more lemon juice.
  • Spiced Version: A pinch of cinnamon or nutmeg works well.
  • Mini Pies: Make smaller individual pies instead.

Sweet and tangy cherry pie with a flaky vegan crust, juicy filling, and perfectly thickened fruit, baked until golden and bubbling.
Prep Time 30 minutes
Cook Time 2 hours 24 minutes
Total Time 2 hours 54 minutes
Servings: 10
Course: Dessert
Cuisine: American
Calories: 320

Ingredients
  

  • 1 batch vegan pie crust prepared ahead
  • 600 g cherries pitted
  • 150 g granulated sugar
  • 40 g cornstarch
  • 1 tablespoon lemon juice
  • 1 tablespoon vanilla extract
  • 2 tablespoons vegan butter

Equipment

  • Pie dish
  • Mixing bowl
  • Saucepan
  • Rolling pin
  • Knife or pastry cutter
  • Spoon or spatula
  • Measuring cups and spoons

Method
 

  1. Make the vegan pie dough ahead of time and allow it to chill before use.
  2. In a bowl, toss the pitted cherries with sugar, cornstarch, lemon juice, and vanilla extract until well combined.
  3. Transfer any released juices to a saucepan and simmer until thickened. Mix the thickened juices back into the cherries.
  4. Let the cherry filling rest and cool slightly before adding it to the crust.
  5. Roll out one portion of the dough and fit it into your pie dish.
  6. Pour the prepared cherry mixture evenly into the crust.
  7. Cover with a full crust or create a lattice top, then seal the edges.
  8. Bake at a high temperature initially, then reduce the heat and continue baking until the crust is golden and the filling is bubbling.

Nutritional Snapshot (Per Serving)

NutrientAmount
Calories~320
Carbohydrates~55g
Fat~10g
Protein~3g

Storage and Leftover Tips

  1. Refrigerate Properly: Store covered for up to 5 days.
  2. Let It Set Fully: Chilling helps the filling firm up.
  3. Reheat Gently: Warm slices in the oven for best texture.
  4. Avoid Microwave if Possible: It softens the crust.
  5. Freezing Works: Wrap well and freeze for longer storage.

How I Like to Serve This Dish

  1. Slightly Warm: Just enough to bring the flavors out.
  2. With Ice Cream: Classic pairing that never fails.
  3. With Whipped Cream: Light and simple.
  4. On Its Own: Honestly, it doesn’t need anything else.
  5. Late Night Slice: This hits differently at night.

FAQs

  1. Can I use frozen cherries? Yes, just thaw and drain properly.
  2. Why is my filling runny? It may need more thickening or chilling time.
  3. Can I skip the lattice top? Absolutely, a full crust works fine.
  4. Do I have to chill before slicing? Highly recommended.
  5. Can I make it ahead? Yes, it actually gets better as it rests.
  6. What if my crust browns too fast? Cover edges with foil.
  7. Can I reduce sugar? Yes, adjust to taste.
  8. How do I know it’s done? The crust is golden and filling is bubbling.

The Last Bite

This pie isn’t quick, and it isn’t effortless.

But it’s the kind of thing that reminds you why slowing down in the kitchen can actually be worth it.

And if you end up sneaking a slice before it’s fully set… I won’t judge. I’ve done it too.

Author Image

Ethan

I am a 28-year-old part-time barista, full-time vibe curator, and above all, an enthusiastic amateur cook living in Austin, Texas. .

Rate This Recipe

Thank you for rating! 🤍

Leave a Reply

Your email address will not be published. Required fields are marked *

Recipe Rating


PIN & SAVE

Follow on Pinterest

Craving more cozy, easy, and scroll-worthy recipes? Follow along and never lose a favorite again.

Follow Me on Pinterest →

You'll also love