The first time I made these Red Velvet Crinkle Cookies, it was because I was trying to impress someone. I won’t name names, mostly because it didn’t work out, but I was determined to bring “fancy but not too fancy” dessert energy to a holiday potluck.
I remember standing in the baking aisle, staring at cake mixes like I was choosing a life partner. Eventually, I grabbed the red velvet one because it made me feel like I had my life together. (Spoiler: I didn’t.)
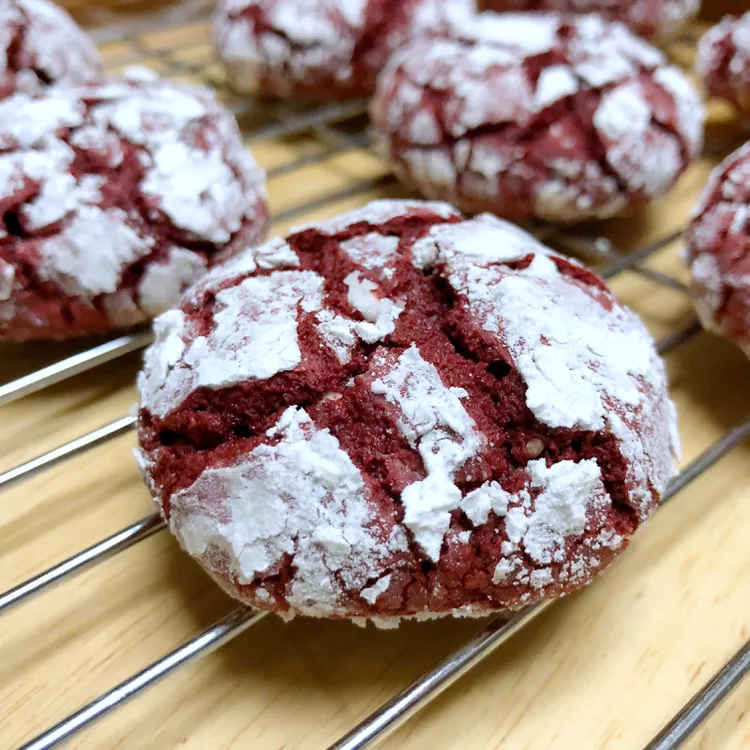
When the cookies came out of the oven, they looked like tiny red planets dusted in sugar snow not perfect, not even symmetrical, but charming in the way homemade things always are. I brought them to the potluck, people devoured them, and even though the relationship didn’t last… these cookies did.
Now I make them when I want something festive without the drama. They’re easy, they’re pretty, and they make me look like I tried harder than I actually did, which is honestly my dream in the kitchen.
Why I Keep Coming Back to It — Ethan’s Honest Take!
- Holiday Charm in Every Bite: These cookies look like they’re dressed for a Christmas party, even if you’re not.
- Ridiculously Easy: It’s cake mix, butter, eggs the kind of recipe you can make while texting your aunt back.
- Crowd-Pleaser Energy: No matter who I serve them to, someone always says, “Wait… you made these?”
- Soft on the Inside: The crackly outside is pretty, but that chewy center is what I’m here for.
- Zero Stress Baking: No chilling overnight, no complicated steps just mix, roll, bake, enjoy.
- Perfect for Sharing (or Not): I tell myself I’ll gift half the batch… then I eat six warm ones and rethink my generosity.
- Smells Like the Holidays: When these are in the oven, my whole kitchen feels like December.
- Consistent Every Time: Even on my messy, chaotic kitchen days, they still turn out great.
- 1 15.25 ounce box Duncan Hines red velvet cake mix
- 6 tablespoons unsalted butter melted and cooled
- 2 large eggs
- 1 teaspoon lemon zest
- 1 cup powdered sugar
- 1 teaspoon cornstarch
Large mixing bowl
Measuring cups and spoons
Fork (for coating mixture)
Baking sheets (ungreased)
Cooling rack
Spoon or cookie scoop
Zester
Preheat the Oven: Set the oven to 375°F (190°C).
Mix the Dough: Stir together cake mix, cooled butter, eggs, and lemon zest until a soft dough forms.
Make Coating: Combine powdered sugar and cornstarch in a shallow dish using a fork.
Shape the Cookies: Roll 1-inch dough balls in the sugar mixture and place them 2 inches apart on ungreased baking sheets.
Bake: Bake one sheet at a time for 9–11 minutes, until set in the center.
Cool Completely: Cool on the sheet for 1 minute, then move to a wire rack to finish cooling for about 15 minutes.
Real-Life Cooking Notes from Ethan!
- Mix Fast, Not Fancy: Don’t overthink it — just mix the dough until everything comes together. You’re not auditioning for a baking show.
- Use Cooled Butter: Hot butter turns the dough gloopy. Learned that the sticky way.
- Powdered Sugar Trick: Mix the powdered sugar with cornstarch — it helps the crinkles pop and stay white, not melt.
- Coat Generously: Roll each dough ball like you’re committing to the powdered sugar lifestyle. Bare spots don’t crinkle as nicely.
- Chill if Sticky: If the dough feels too soft, pop it in the fridge for 10 minutes. It makes rolling much easier.
- Don’t Overbake: They might look soft when you pull them out, but they firm up as they cool. Trust the process — this is amateur cooking wisdom earned through many burnt bottoms.
- Size Matters: Smaller balls = more crinkles. Bigger ones = softer centers. I usually mix it up because consistency is overrated.
- Store Smart: Keep them in an airtight box with a piece of bread. The bread keeps the cookies soft — I don’t know the science, I just know it works.
My Most Loved Cookie Recipes!
- Snickerdoodles
- Vanilla Biscuits
- Best Snowball Cookies
- Sugar Cookie Fudge
- Cranberry Orange Cookies
The Last Bite
If you’re looking for a cookie that makes people smile, looks festive with almost no effort, and forgives every amateur mistake along the way this is it.
And if your first batch disappears suspiciously fast, don’t worry. That just means you’re officially the Red Velvet Cookie Person now… a title I wear proudly.
Want me to write another Ethan-style article for any of your other ingredient lists?
Variations and Simple Substitutions
- Different Nuts
Pecans, walnuts, almonds — all work beautifully.
- Almond Flavor Boost
Add a drop of almond extract for a bakery-style twist.
- Chocolate Snowballs
A little cocoa powder gives a chocolatey version.
- Spiced Sugar Coating
Mix cinnamon into the powdered sugar.
- Coconut Finish
Add shredded coconut to the sugar roll.
- Gluten-Free Swap
Use a 1:1 gluten-free flour blend.
- Mini Snowballs
Smaller cookies bake faster and are great for parties.
Storage and Leftovers (If Any Survive)
- Room Temperature Storage
Keep them in a loosely covered container.
- Best Within 4–5 Days
They stay soft and flavorful for several days.
- Avoid Airtight Containers
Too much sealing makes them overly soft.
- Layer With Parchment
This keeps the powdered sugar intact.
- Freezer-Friendly Option
Freeze uncoated cookies, then roll in sugar after thawing.
- Bring to Room Temp Before Serving
Texture is best once they’ve warmed slightly.
- Don’t Refrigerate
The fridge dries them out faster.
FAQs People Always Ask Me
- Can I make these ahead of time?
Yes, they actually taste better the next day.
- Why did my cookies spread too much?
The butter was likely too warm.
- Do I really need to roll them twice?
For the classic look and texture, yes.
- Can I freeze snowball cookies?
Absolutely — freeze before coating in sugar.
- Are these Mexican wedding cookies?
Very similar, just different names.
- Can I reduce the sugar?
Slightly, but powdered sugar is key to texture.
- Why are mine crumbly?
Too much flour or overbaking usually causes that.


Leave a Reply