I’ll be honest with you, for years, every time someone said “gluten-free pizza,” I’d politely smile while secretly planning to grab a regular slice on my way home. I’ve tried versions that tasted like cardboard, versions so crumbly they fell apart just by looking at them, and versions that made me think maybe pizza should’ve come with a “gluten required” label.
But then one night, a friend of mine who’s been gluten-free for health reasons came over to watch a game. He joked about missing “real pizza,” and something in me snapped a little. Maybe pride, maybe curiosity, maybe just hunger. But I thought, You know what? Let me try making a gluten-free dough that doesn’t disappoint the soul.
Enter my accidental adventure into this Easy Gluten-Free Pizza Crust Recipe. What started as a “let’s see what happens” moment turned into a full-blown hobby. Suddenly, I was reading bags of flour like novels and whisking psyllium husk like I knew what I was doing.
The wild part? It worked.
Like… it really worked.
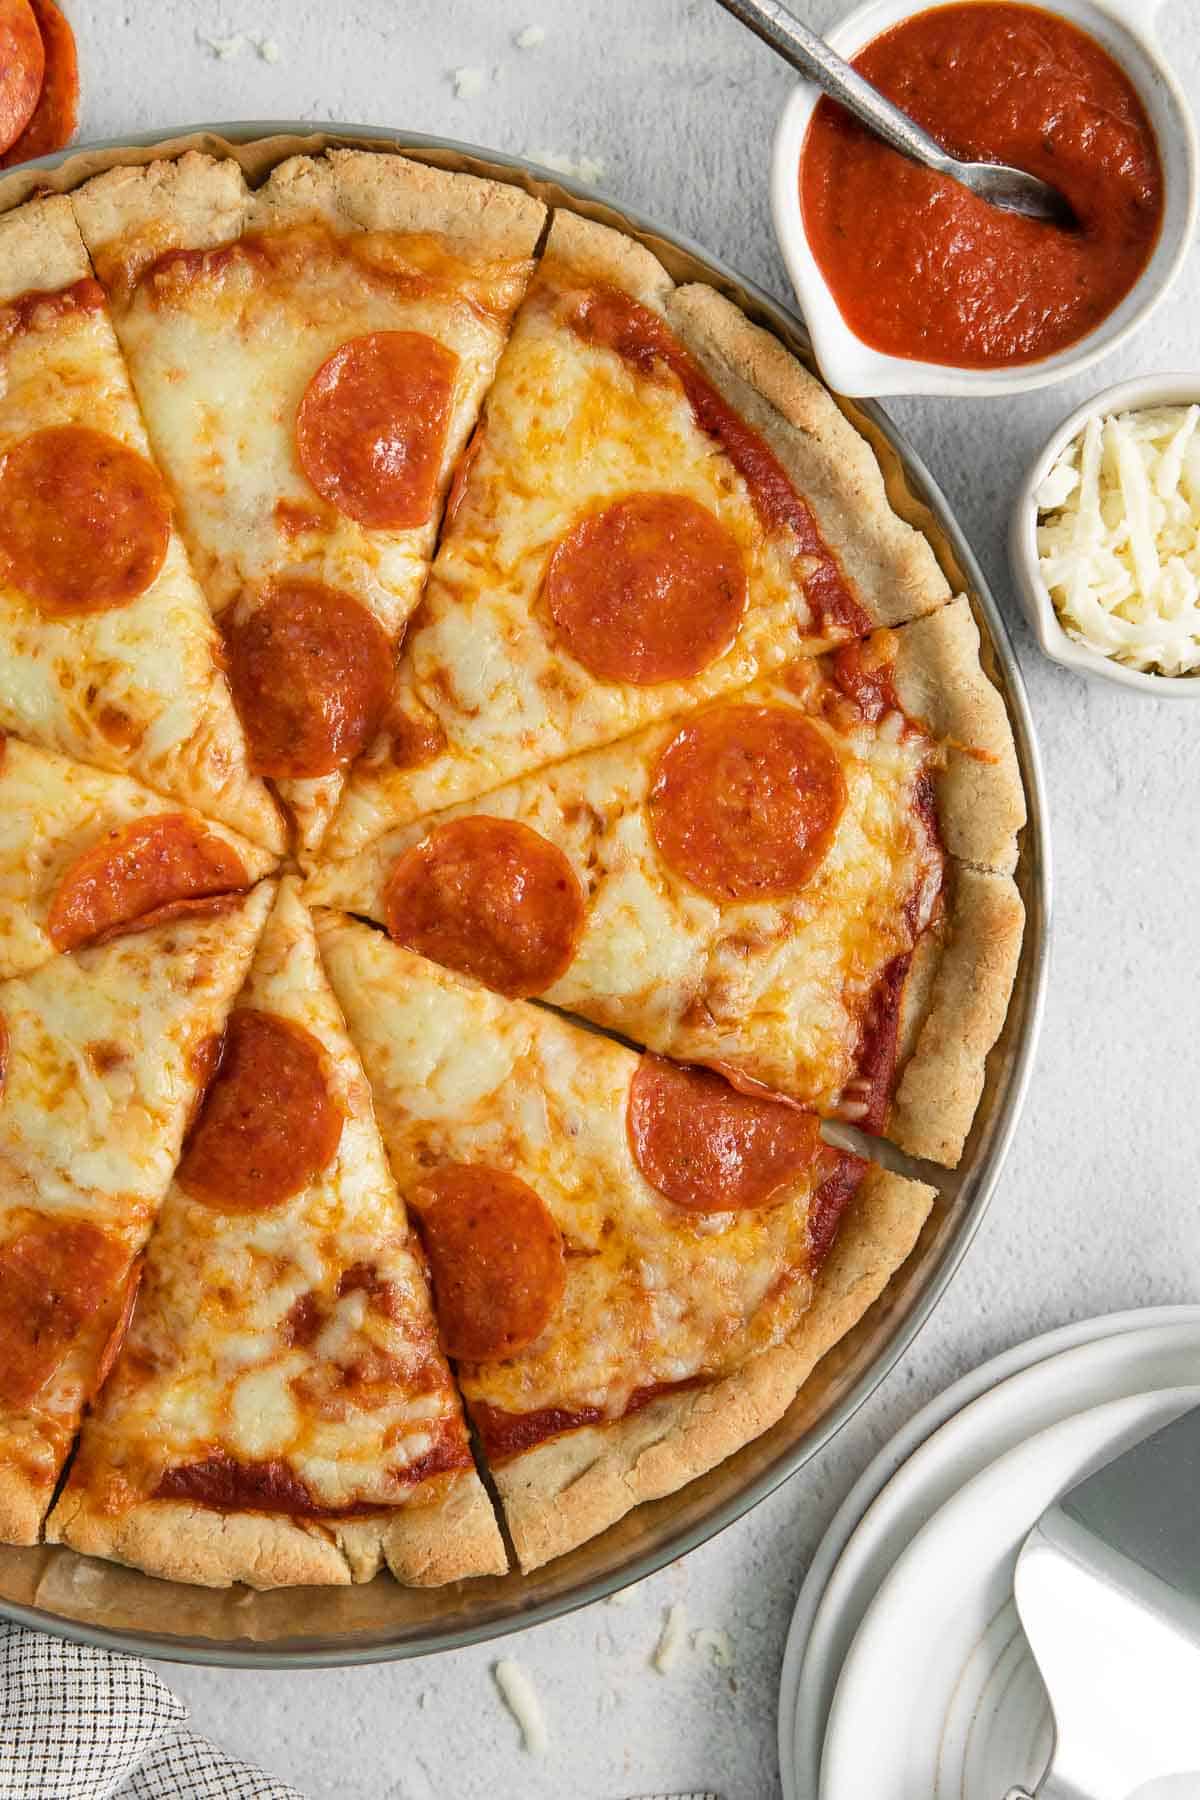
This crust soft inside, crisp edges, not crumbly, not sandy, actually pizza-like — became the base for every pizza night since. And somewhere in that journey, I realized I’d basically created the Easy Gluten Free Pizza Dough Recipe I had always wished existed.
So here I am, kitchen counter messy, apron questionable, telling you with complete sincerity: gluten-free pizza can taste like the real thing. Also dont forget to try my Crispy Potato Latkes, which is the ultimate favourite at my home. Let me show you why this one sticks around in my life.
Why I Keep Coming Back to This Dough — Ethan’s Honest Take
- It Actually Feels Like Pizza: Not cake. Not bread. Not sadness. Actual pizza crust you can hold with your hands.
- Simple Ingredients: Nothing wild or pretentious — just pantry staples and a little psyllium husk magic.
- Crispy Edges, Soft Middle: My favorite kind of crust: the kind you can fold but still hear a tiny crunch.
- Forgiving Dough: It doesn’t judge you, even if your mixing looks like mild chaos.
- Works With All Toppings: From a classic cheese pizza to barbecue chicken — this crust can take the load.
- Quick to Prep: No long resting times or mysterious kneading instructions.
- Gluten-Free Without Feeling “Alternative”: You don’t eat this as a substitute — you eat it because it’s good.
- Great for Pizza Nights: Everybody gets their own pizza base, and suddenly you’re the hero of the evening.
- 1 cup warm water about 110F
- 1 tablespoon sugar
- 1 1/2 teaspoons instant yeast
- 1 1/2 cups 225g gluten-free measure-for-measure flour
- 1/4 cup almond flour
- 1 tablespoon psyllium husk powder
- 1 teaspoon baking powder
- 3/4 teaspoon salt
- 2 tablespoons olive oil
Stand mixer with paddle attachment
Measuring cups and spoons
Glass measuring cup (for activating yeast)
Mixing bowl
Rubber spatula (preferably oiled)
Plastic wrap (oiled)
12-inch round pizza pan
Parchment paper
Cooking spray
Pizza stone or pizza steel
Oven
Cooling rack (optional, for post-bake resting)
Knife or pizza cutter
Whisk warm water, sugar, and yeast together in a measuring cup and let it sit for 5–10 minutes until foamy.
In a stand mixer fitted with the paddle attachment, combine the gluten-free flour, almond flour, psyllium husk powder, baking powder, and salt. With the mixer running on low, pour in the yeast mixture and olive oil. Increase to medium-high and mix for 5 minutes, until the dough looks like a thick, sticky cookie dough.
Scrape down the bowl with an oiled spatula, making sure everything is well combined. Scoop the dough into a greased pan and smooth the surface with wet hands. Cover with oiled plastic wrap and let it rise in a warm place for 45–60 minutes.
Place a pizza steel or stone in the oven and preheat to 425°F. Line a 12-inch pizza pan with parchment and spray it lightly. Press the dough evenly across the pan using oiled or wet hands; spread it as thin as possible because it will shrink slightly during baking. Let it rest for another 10 minutes.
Bake the crust without toppings for 15–20 minutes. Remove from the oven, add your preferred toppings, and slide the pizza (without the parchment) directly onto the hot steel or stone. Bake for another 10–15 minutes, until the toppings are bubbly and the edges are golden.
Let the pizza cool for 5 minutes before slicing.
Real-Life Cooking Notes from Ethan (a.k.a. What I Messed Up So You Don’t Have To)
- Warm Water Matters: If the water is too hot, the yeast basically gives up and goes home. Keep it around 110°F — warm, not boiling.
- Let the Yeast Wake Up: Give it a few minutes. When it gets foamy, you know the dough will rise right.
- Don’t Skip the Psyllium Husk: It’s the secret that gives gluten-free dough elasticity. Without it, the crust behaves like sand under pressure.
- Oil Your Hands: Gluten-free dough is sticky. A little olive oil makes shaping so much easier.
- Par-Bake the Crust: Bake the dough for a few minutes before adding toppings. It sets the structure and keeps it from becoming soggy.
- Use Parchment Paper: Trust me — gluten-free dough is clingier than a toddler at bedtime.
- Don’t Push the Dough Too Thin: It bakes better with a little thickness. Thin crust + gluten-free = cracker territory.
- Brush the Edges With Olive Oil: It helps the crust crisp and brown beautifully without burning.
The Last Bite
There’s something incredibly satisfying about pulling a homemade pizza out of the oven — especially when the crust is golden, the toppings are bubbling, and the kitchen smells like every childhood pizza night combined.
But what gets me every time with this Easy Gluten Free Pizza Crust Recipe is how normal it feels. No compromise, no weird textures, no apologizing for the gluten-free label. It’s just good pizza. Honest, simple, homemade pizza.
And maybe the best part? Watching someone take a bite and say, “Wait… this is gluten-free?” That look of surprise never gets old.
If you need a little win today — or if you just want pizza that treats your taste buds right give this dough a shot. It might just sneak into your weekly rotation the way it did mine.
Storage & Leftover Handling Tips!
- Store unbaked dough in the fridge for up to 24 hours — just wrap tightly.
- Freeze shaped crusts (without toppings) and bake straight from frozen.
- Leftover baked pizza reheats best in a pan — it brings the crisp back.
- Keep extra dough portions wrapped in parchment to prevent sticking.
- Avoid storing with toppings already on if you want the crust to stay firm.
- Brush lightly with oil before reheating to revive moisture without softening the crust too much.
FAQ
- Does this gluten-free dough rise like regular dough?
Not as much, but enough to give a great texture.
- Can I skip the psyllium husk?
Nope — it’s the glue that holds everything together.
- Can I make this dairy-free too?
Totally. Just choose dairy-free toppings.
- Is almond flour necessary?
Yes, it adds structure and flavor. Skipping it changes the dough.
- Why is my dough too sticky?
Oil your hands or add a tiny bit more gluten-free flour — not too much.
- Can I use active dry yeast instead of instant?
Yes, just bloom it longer in warm water.
- Can I roll it like regular dough?
Not quite — pressing it out with oiled hands works best.
- How long do I par-bake?
Usually 6–8 minutes, just until the edges start to firm up.


Leave a Reply