Fudge is one of those desserts that instantly makes me feel like a kid again. It’s rich, sweet, and slightly dangerous in the way that you know one square will inevitably lead to three more. I first made this simple microwave fudge on a rainy afternoon when I didn’t want to heat up the oven or overcomplicate life.
The first attempt was a bit messy, with chocolate sticking to the spatula, condensed milk bubbling over—but the taste? Perfect. Sweet, chocolatey, and smooth with just enough bite from the nuts I added. Standing there, scraping the last bits from the bowl, I remember thinking: sometimes the simplest recipes are the most satisfying.
Now, this fudge is my go-to when I need a quick gift, a last-minute dessert, or just a chocolate fix that makes life feel a little sweeter. Try Christmas Yule Log and Peppermint Patties for more chocolatey recipes.
Why This Is My Go-To?
- No Oven Needed: Microwave fudge is perfect when you want something fast without turning on the oven.
- Super Simple Ingredients: Chocolate, butter, and sweetened condensed milk—nothing complicated.
- Kid-Friendly Fun: Kids can help mix, pour, and even lick the spatula. Minimal risk, maximum joy.
- Customizable: Add nuts, dried fruit, or even a swirl of peanut butter—endless options.
- Rich and Satisfying: One small square feels indulgent without being overwhelming.
- Great for Gifting: Wrapped in parchment or cellophane, it feels homemade and special.
- Minimal Cleanup: One bowl, one pan, and that’s it.
- 3 cups semisweet chocolate chips
- 1 14 ounce can sweetened condensed milk
- ¼ cup unsalted butter cut into pieces
- 1 cup chopped walnuts Optional
Medium saucepan
Wooden spoon or heatproof spatula
Measuring cups and spoons
8×8-inch or 9×9-inch baking pan
Parchment paper or foil
Knife and cutting board (if adding walnuts)
Start by lining your baking pan with parchment paper or foil so the fudge doesn’t stick.
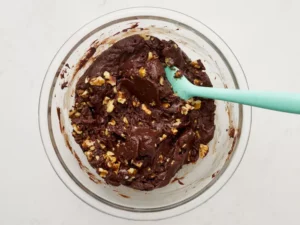
In a medium saucepan over low heat, combine the chocolate chips, sweetened condensed milk, and butter. Stir constantly until the chocolate is completely melted and smooth. This gentle heat keeps the chocolate from seizing.
Once smooth, remove the pan from the heat and stir in the chopped walnuts if you’re using them.
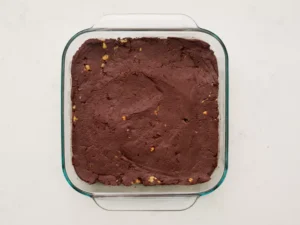
Pour the fudge mixture into the prepared pan and spread it evenly. Let it cool at room temperature until firm, or pop it in the refrigerator to speed things up.
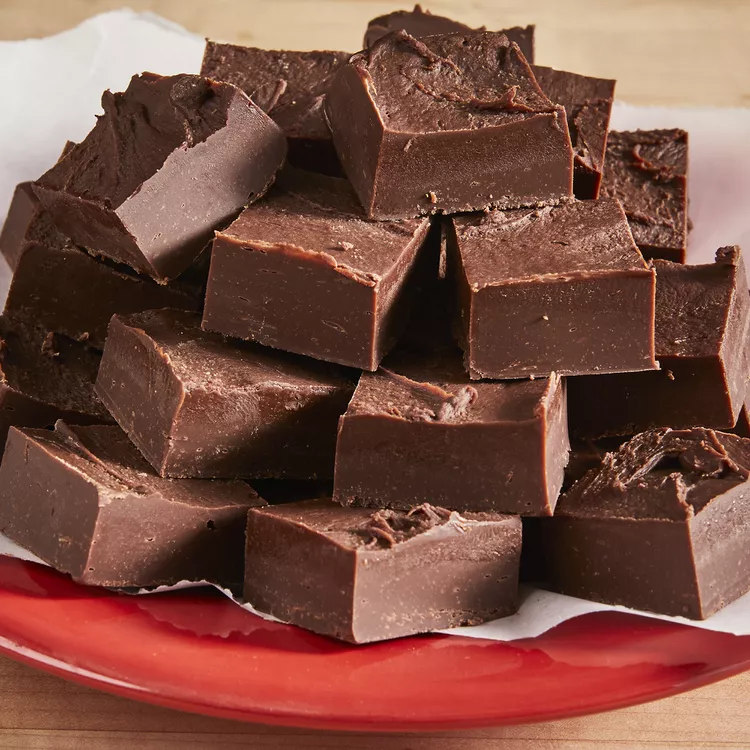
Once set, lift the fudge from the pan using the parchment paper or foil, cut it into squares, and enjoy!
Tips You Must Know!
- Stir Frequently: Microwave in short bursts and stir to prevent scorching. Chocolate is sensitive.
- Grease Generously: The pan should be well-greased so the fudge comes out in neat squares.
- Nuts Are Optional: I love walnuts for texture, but chocolate-only works beautifully too.
- Microwave Strength Varies: Check at 3 minutes and adjust; you want smooth, melted chocolate, not scorched.
- Use a Rubber Spatula: Makes scraping the bowl and folding in nuts much easier.
- Let It Chill Fully: Two hours in the fridge is non-negotiable for clean cuts.
- Cut with a Warm Knife: Run your knife under hot water and dry it for perfect squares.
- Store Properly: Keep in an airtight container to prevent drying out or picking up fridge smells.
Variations You Will Enjoy Trying!
- Peanut Butter Swirl: Drop spoonfuls of peanut butter and swirl gently before refrigerating.
- Mint Chocolate: Add a few drops of peppermint extract for a refreshing twist.
- Espresso Kick: A teaspoon of instant coffee deepens the chocolate flavor.
- Coconut Delight: Fold in shredded coconut for texture and a tropical vibe.
- Chocolate Chips Mix: Use a combination of semi-sweet and milk chocolate for a layered effect.
- Nut Variety: Swap walnuts for pecans, almonds, or hazelnuts.
- Sea Salt Finish: Sprinkle flaky sea salt on top before chilling for a sweet-salty contrast.
Storage and Leftover Tips!
- Room Temperature: Keeps well in an airtight container for about a week.
- Refrigerator: If it’s hot in your kitchen, store in the fridge; just bring to room temp before serving.
- Freeze for Later: Wrap tightly in plastic and foil. Thaw at room temperature for best texture.
- Layering: Use parchment paper between layers to prevent sticking.
- Avoid Sunlight: Chocolate loves cool, dark places. Keep out of direct light.
How I Like to Serve This Dish?
- Holiday Plates: Cut into neat squares and add a little festive touch with sprinkles or nuts.
- With Coffee or Tea: One square is perfect alongside a hot drink.
- As a Sweet Snack: Great for a quick chocolate fix when life calls for it.
- Gift Packs: Individually wrapped squares in a tin or small bag make perfect gifts.
- Party Tray: Works well with other small treats for sharing at gatherings.
FAQs
- Can I use milk chocolate instead? Yes, but it will be sweeter and slightly softer.
- Do I have to use nuts? No, they’re optional. The fudge is delicious on its own.
- Can I make this ahead of time? Absolutely. It stores well and tastes great even a few days later.
- Can I double the recipe? Yes, just use a larger bowl and pan.
- What if my fudge is too soft? Chill longer in the fridge; sometimes it just needs more time to set.
- Can I add flavors? Vanilla, peppermint, or coffee are all great additions.
- How thick should I pour the mixture? About 1 to 1.5 inches in the pan works best for even setting.
- Can I use a different pan? Yes, any shallow dish works, just adjust greasing accordingly.
The Last Bite
This fudge is proof that you don’t need fancy tools or complicated steps to make something special. Rich, chocolatey, and forgiving, it’s a little bit of indulgence that makes your day better. If your first batch isn’t perfect, scrape it into squares anyway—it will still taste like victory.


Leave a Reply