Get this recipe sent to your inbox, plus
new home-style recipes from An Amateur Cook every week.
I’ll be honest, the first time I heard “flourless chocolate cake,” I assumed it was one of those desserts that tries to be impressive but ends up being complicated and slightly intimidating. Also… no flour? That felt suspicious.
But then I had a slice at a friend’s dinner. It didn’t look flashy. Just a simple, dark, rich-looking cake with a dusting of powdered sugar. I took a bite and immediately stopped mid-conversation. You know that moment when your brain just goes, okay, this is serious?
It was dense but smooth, rich but not heavy, and somehow melted as you ate it. No frosting, no layers, no fuss. Just chocolate doing its thing.
Of course, I went home and tried to make it.
The first attempt? I overbaked it. The second? I rushed the chilling step and ended up with something closer to pudding. But somewhere between those small failures, I figured it out.
And now, this is the cake I make when I want something that feels a little dramatic without actually being dramatic to make.
Table of Contents
Why This Is My Go-To Chocolate Fix
Deep Chocolate Flavor: This isn’t just chocolate cake. It’s chocolate in its most intense, honest form.
No Flour, No Problem: Somehow skipping flour makes it feel simpler, not harder.
Minimal Ingredients: You don’t need a long grocery list. Just a few things done right.
Feels Fancy Without Effort: It looks like something from a bakery window, but you made it in your kitchen.
Perfect for Small Gatherings: Rich enough that small slices go a long way.
Make-Ahead Friendly: It actually needs time to chill, which means less stress later.
That Texture: Somewhere between a cake, a brownie, and a truffle. I still can’t fully explain it, but I love it.
Ingredients You’ll Need
Water: 1/2 cup
Salt: 1/4 teaspoon fine sea salt
Sugar: 3/4 cup granulated sugar
Bittersweet Chocolate: 18 oz (2 1/4 cups chips or chopped)
Butter: 1 cup salted, room temperature
Eggs: 6, room temperature
Vanilla Extract: 1 teaspoon
Before You Start (A Quick Reality Check)
Don’t Fear the Water Bath: It sounds like a big deal, but it’s just a fancy way of saying “keep the cake gentle while baking.”
Patience Is Part of the Recipe: This cake needs time, especially for chilling. I’ve tried to rush it. It never ends well.
How I Make It (Step by Step, Calmly)
Preheat and Prep: Oven goes to 300°F. I grease a 9-inch pan and line it with parchment because I’ve learned my lesson about sticking.
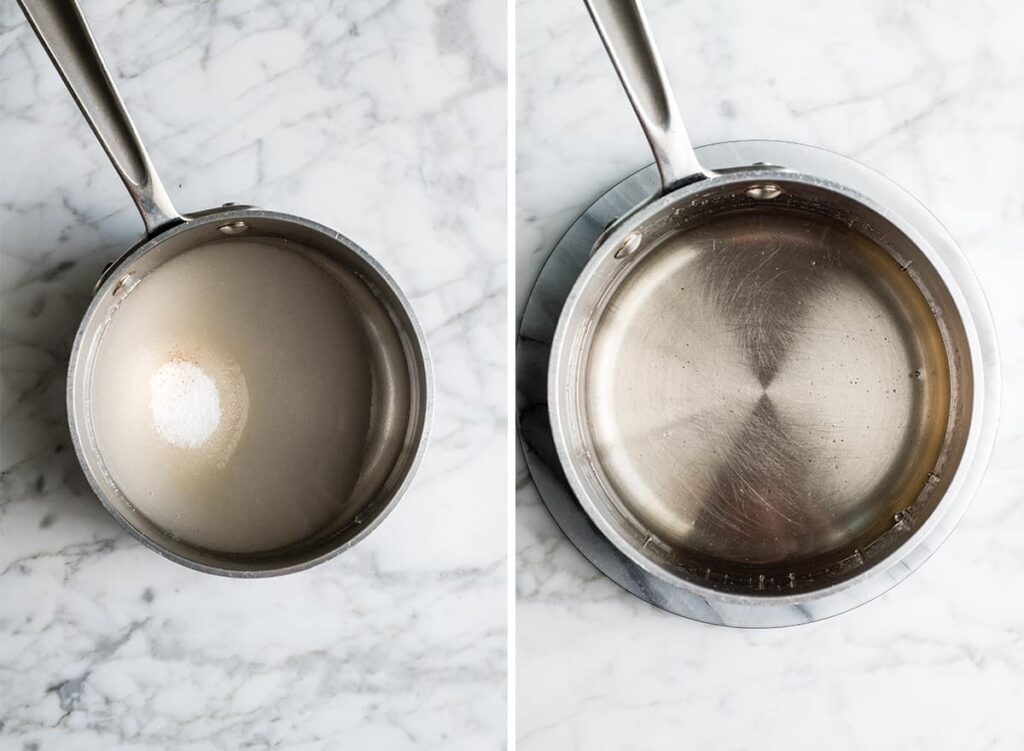
Make the Sugar Mix: In a saucepan, I heat water, salt, and sugar until everything dissolves. Nothing complicated here.
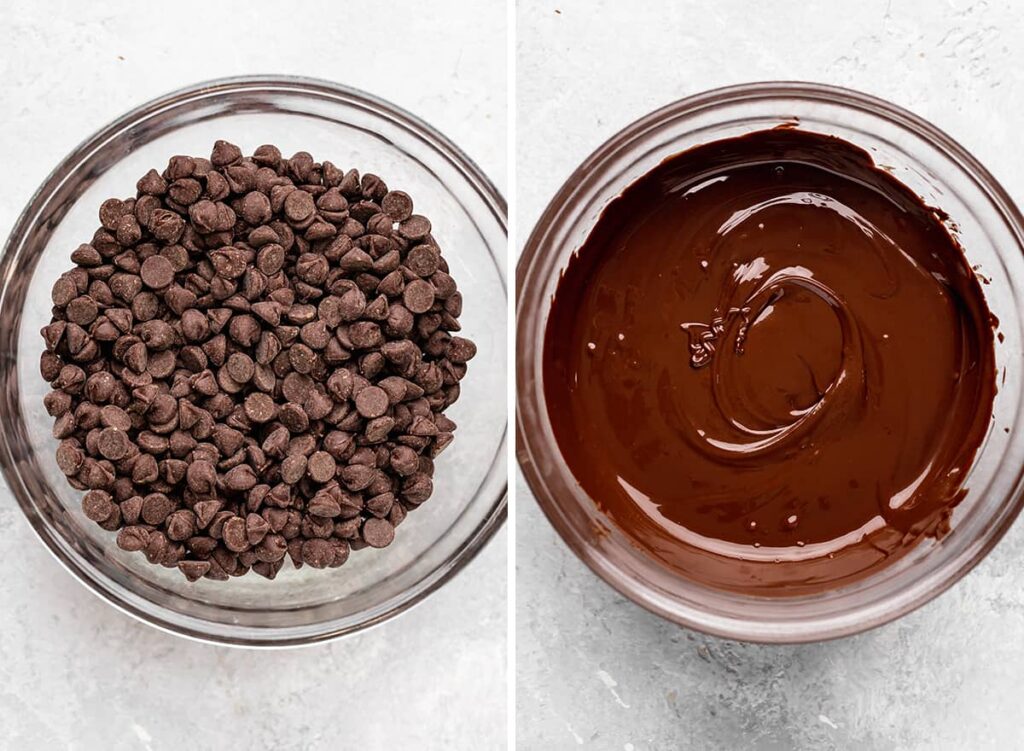
Melt the Chocolate: Microwave or double boiler, whatever I’m in the mood for.
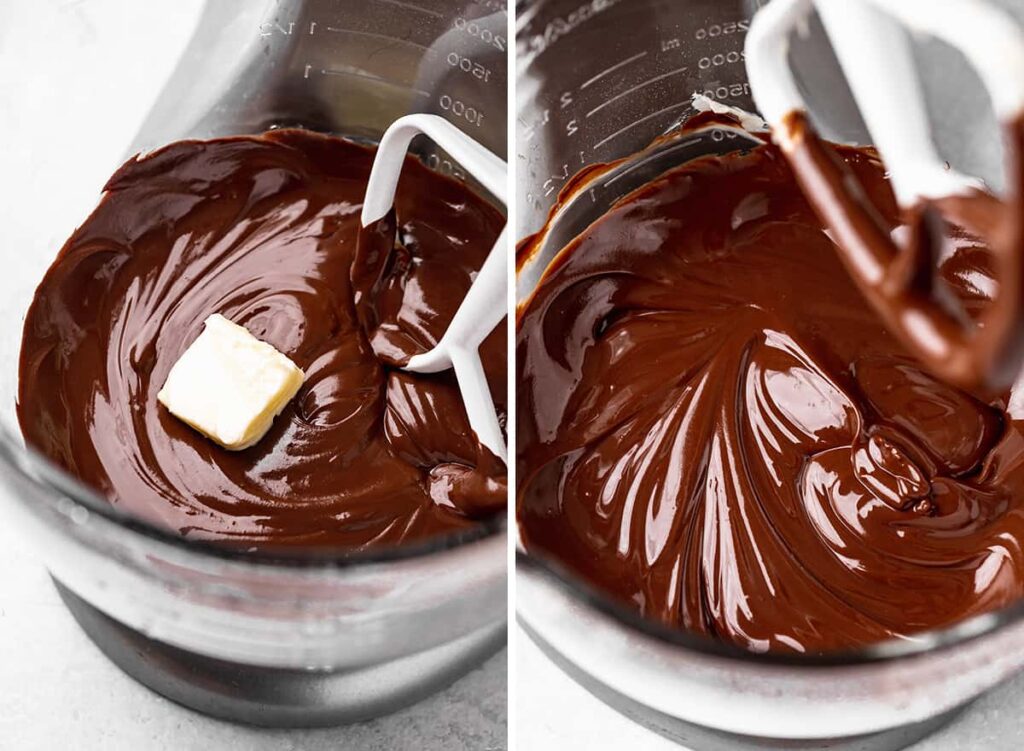
Add the Butter: I mix butter into the melted chocolate one piece at a time. It turns glossy and smooth.
Combine Everything: The warm sugar mixture goes into the chocolate, and I stir until it comes together.
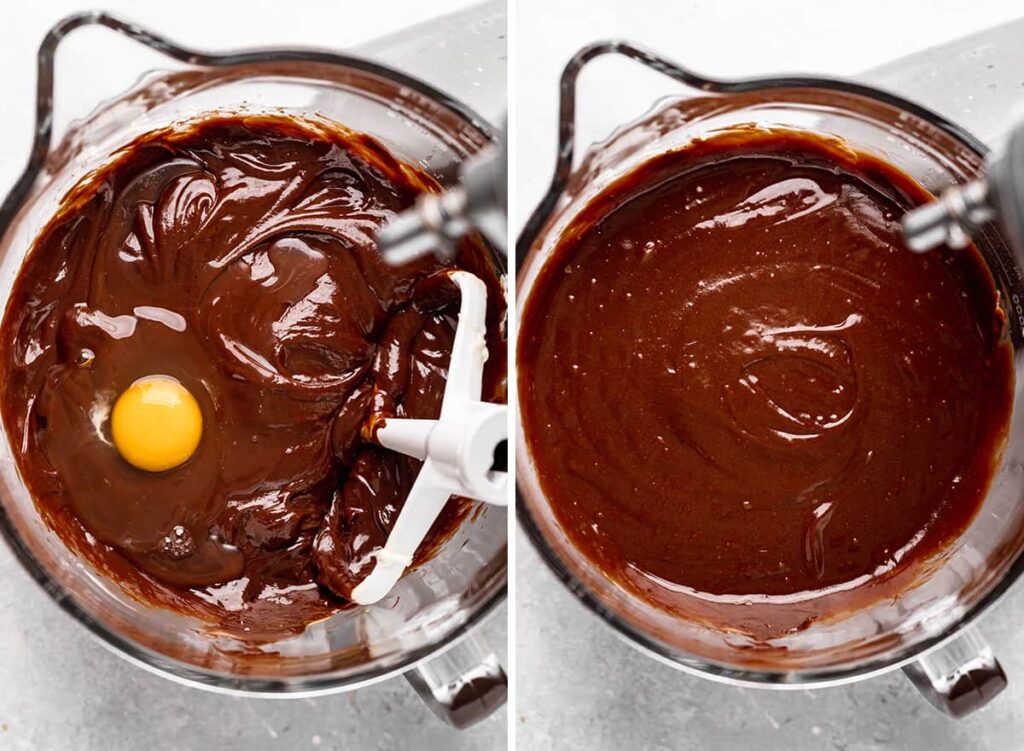
Add Eggs Slowly: One egg at a time. This part feels slow, but it makes the batter silky.
Vanilla Goes In: A quick mix, nothing dramatic.
Pour and Prep the Bath: Batter into the pan, then the pan into a larger dish.
Add Hot Water: Carefully pour boiling water around it. Halfway up the sides is enough.
Bake Gently: About 45 minutes. The center should still jiggle slightly.
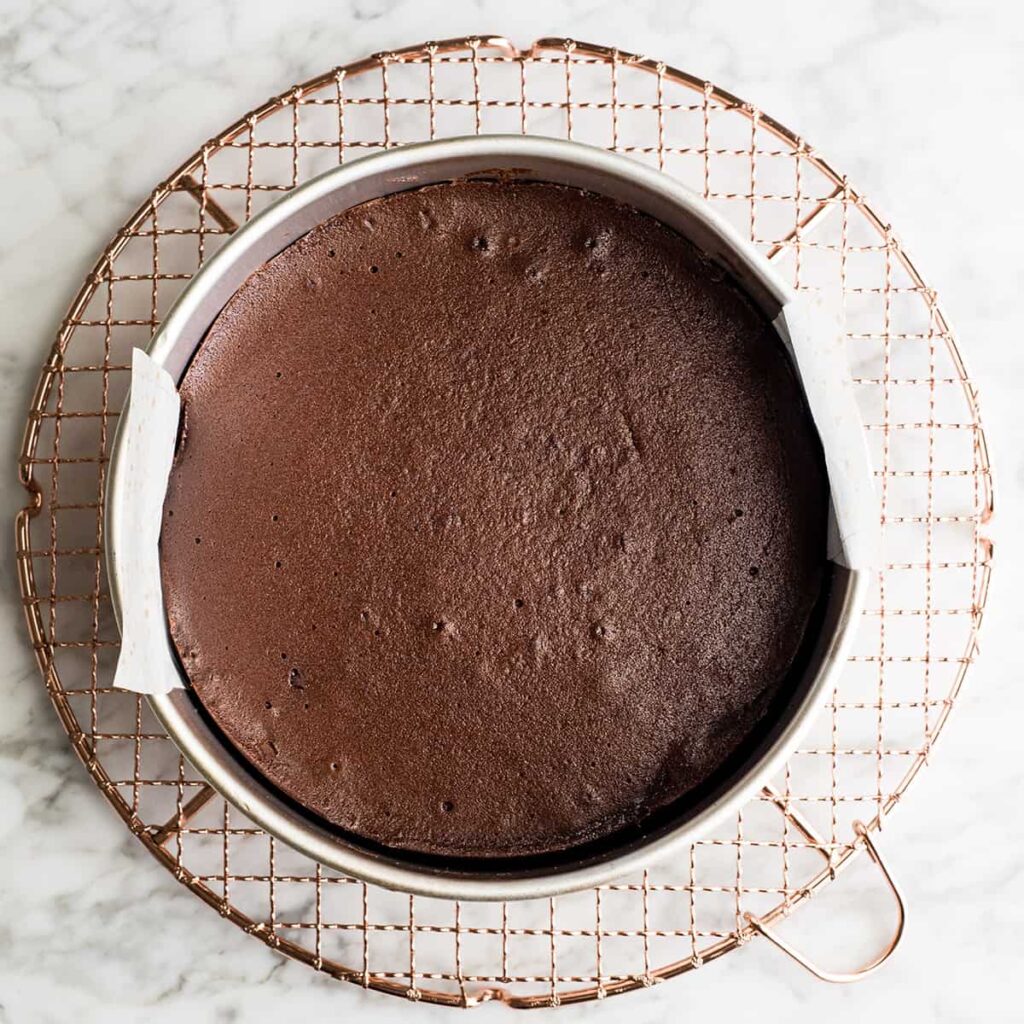
Cool It Down: Out of the water bath, onto a rack.
Chill Overnight: This is where it transforms.
Tips I Learned the Hard Way
Don’t Skip the Water Bath: I tried once. The texture was completely off.
Use Good Chocolate: This cake is mostly chocolate, so it matters more than usual.
Room Temperature Ingredients Help: Everything mixes smoother and behaves better.
Don’t Overbake: A slight jiggle in the center is exactly what you want.
Chilling Is Non-Negotiable: It firms up and develops flavor overnight.
Line the Pan Properly: Getting it out cleanly is half the battle.
Go Slow with Eggs: Rushing this step can mess up the texture.
Slice with a Warm Knife: Cleaner slices, less sticking.
Variations You Will Enjoy Trying
Coffee Boost: Add a little espresso powder to deepen the chocolate flavor.
Orange Twist: A bit of orange zest adds a subtle brightness.
Nutty Addition: Crushed hazelnuts or almonds for texture.
Spiced Version: A pinch of cinnamon or chili powder gives it a warm edge.
Berry Layer: Serve with raspberry sauce for contrast.
Salted Top: A sprinkle of sea salt on top takes it to another level.
Flourless Chocolate Cake Recipe
Rich, dense chocolate cake made without flour, blended with butter and eggs, baked in a water bath for a silky texture.
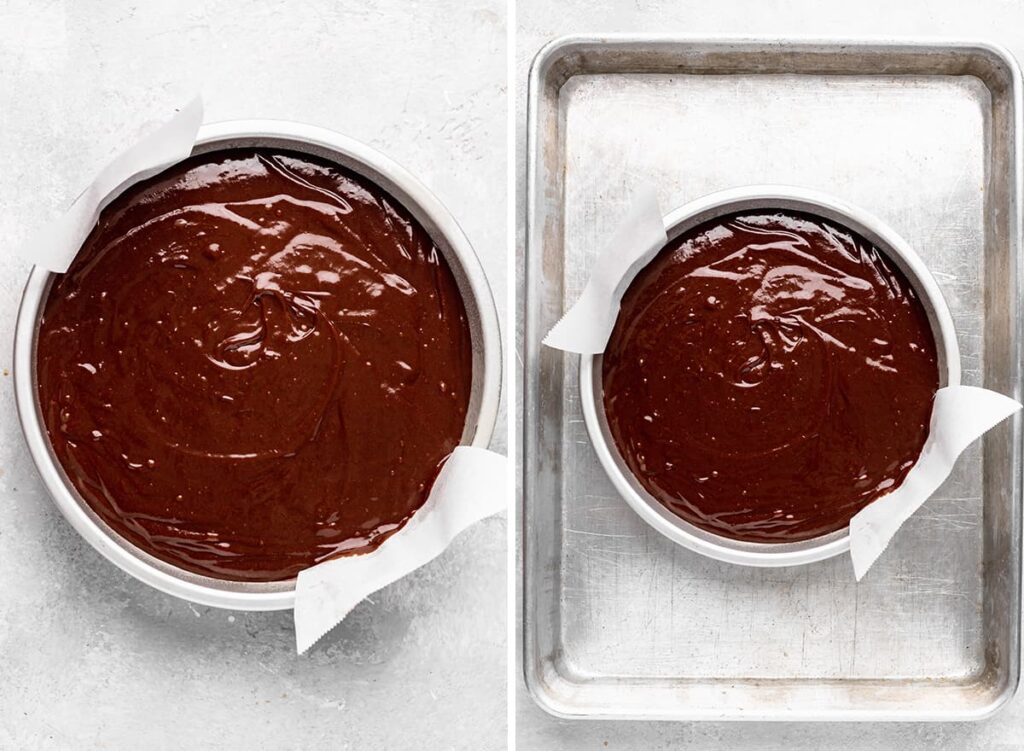
Preheat the oven to 300°F (150°C). Grease a 9-inch round cake pan. Line the bottom with parchment paper (with extended edges for easy lifting) and lightly grease again.
In a small saucepan over medium heat, combine water, salt, and sugar. Whisk occasionally until fully dissolved, then remove from heat and set aside.
Melt the chocolate chips using a microwave or double boiler. Transfer the melted chocolate to a stand mixer bowl.
Cut the butter into tablespoon-sized pieces. Beat into the melted chocolate one piece at a time until fully incorporated.
Pour the warm sugar-water mixture into the chocolate mixture and mix until smooth.
Beat in the eggs one at a time, ensuring each egg is fully incorporated before adding the next. Continue until the batter is smooth.
Stir in the vanilla extract and mix just until combined.
Pour the batter into the prepared cake pan.
Place the cake pan inside a larger baking pan and transfer to the oven. Carefully pour boiling water into the outer pan until it reaches halfway up the sides of the cake pan.
Bake for about 45 minutes. The edges should be set while the center remains slightly soft with a gentle jiggle.
Remove the cake from the water bath and let it cool completely on a wire rack.
Refrigerate the cake in the pan for at least 6 hours or overnight for best texture.
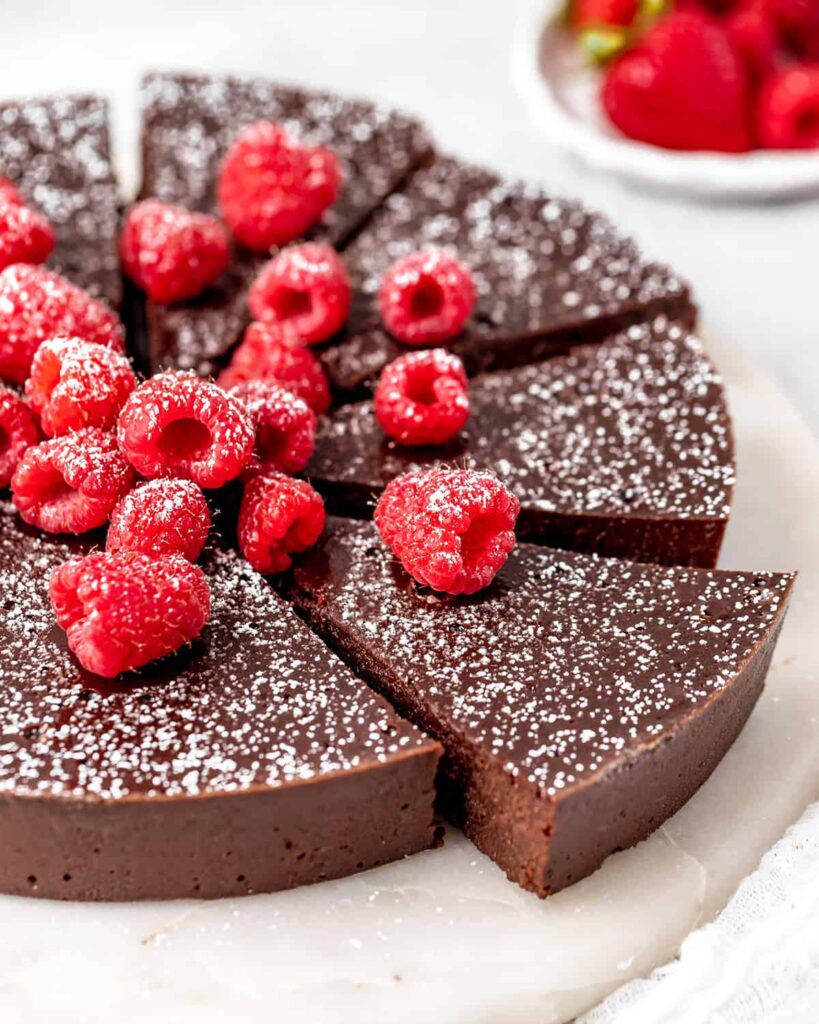
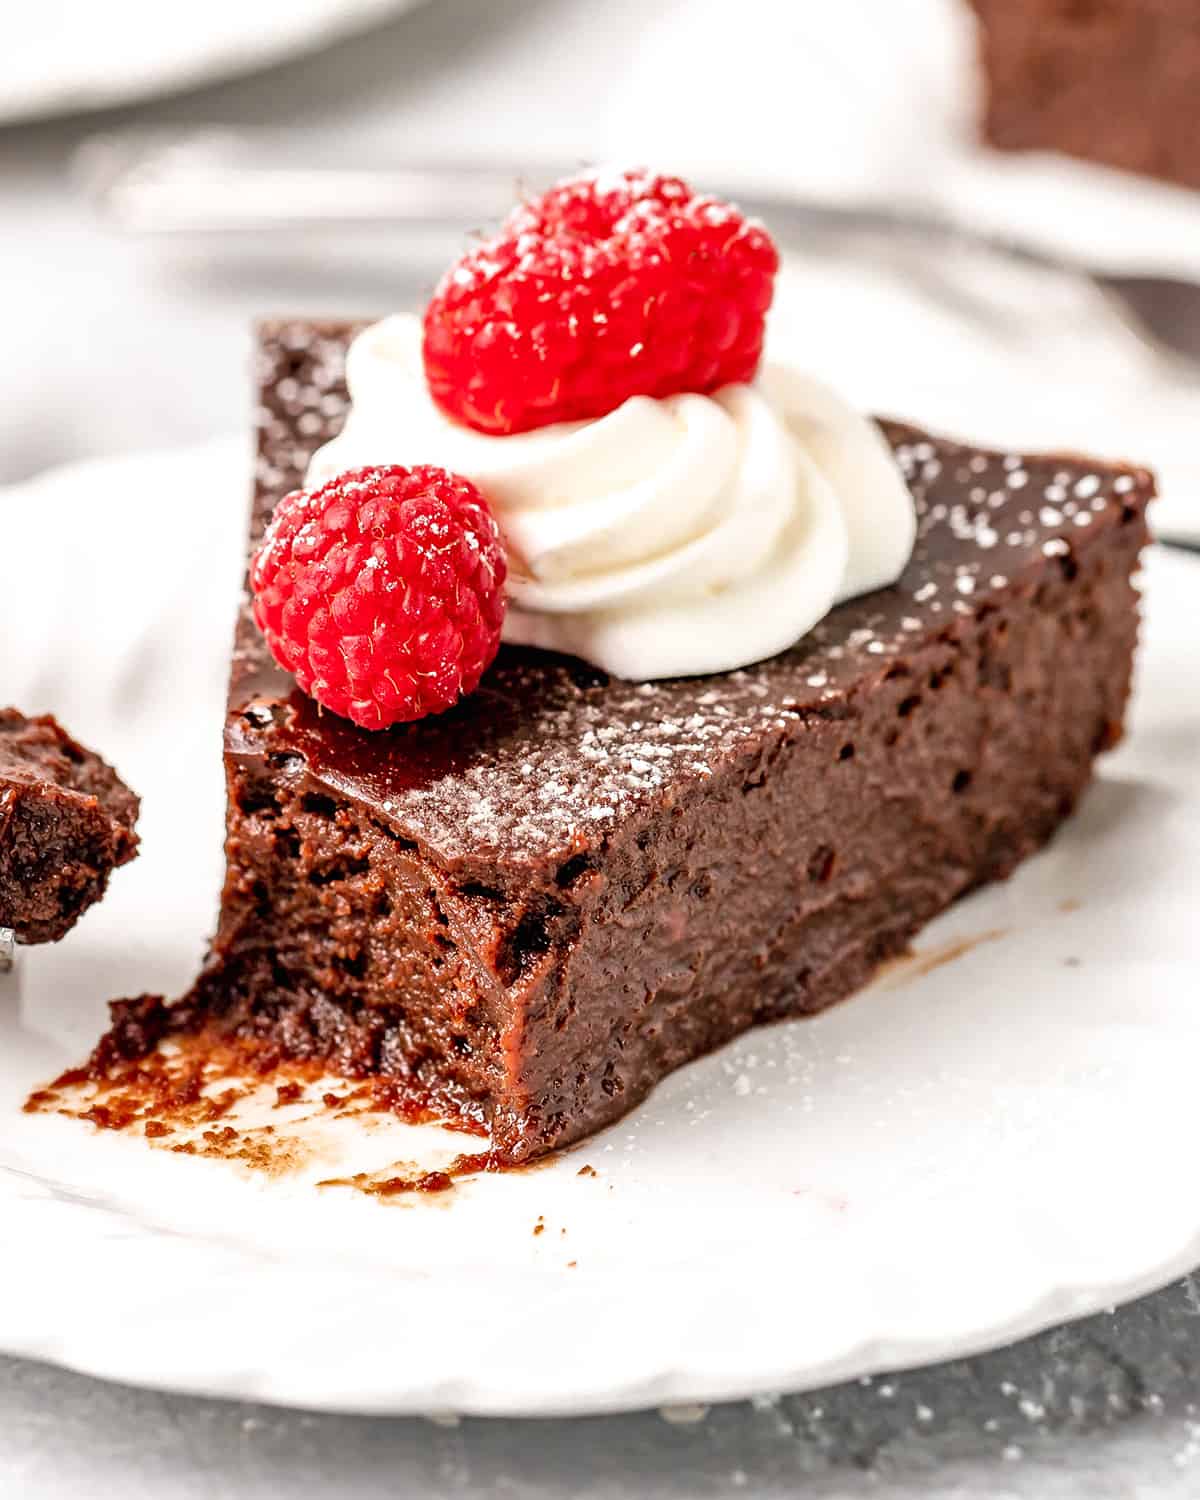
Lift the cake out using the parchment paper and transfer to a serving plate. Dust with powdered sugar and serve with berries or ice cream if desired.
Nutrition (Per Slice Approx.)
Nutrient
Amount
Calories
422 kcal
Fat
30.5 g
Protein
5.1 g
Carbs
39.2 g
Storage and Leftover Tips
Keep It Refrigerated: This cake lives in the fridge.
Tastes Better the Next Day: Somehow it just does.
Cover It Well: Prevents it from drying out or picking up fridge smells.
Freeze in Slices: Works surprisingly well for future cravings.
Let It Sit Before Serving: A few minutes at room temp improves texture.
How I Like to Serve This Cake
Simple Dusting: Powdered sugar on top is enough.
With Berries: Fresh berries balance the richness.
Ice Cream Sidekick: Vanilla ice cream makes it feel like a full dessert moment.
With Coffee: This combo never fails.
A Little Whipped Cream: Lightens things up just enough.
FAQs
Is it very dense: Yes, but in a good way. Think rich and smooth, not heavy.
Can I skip the water bath: I wouldn’t recommend it. It really affects texture.
Why did my cake crack: Usually from overbaking or skipping the water bath.
Can I use dark chocolate instead: Yes, just expect a slightly more intense flavor.
How do I know it’s done: The edges set, center slightly jiggly.
Can I make it ahead: Definitely. It’s actually better that way.
Why is it too soft: Probably needs more chilling time.
Can I reduce sugar: Slightly, but it may affect texture and taste.
The Last Bite
This cake isn’t about perfection. It’s about slowing down, trusting the process, and letting chocolate do what it does best.
If it feels a little intimidating at first, that’s okay. Mine did too. Just give it a try. And if it doesn’t turn out perfect, well… you’ll still end up with chocolate. That’s a pretty good backup plan.


Leave a Reply