Kool Aid Grapes

An Amateur Cook – Save Recipe

Save this recipe!

Get this recipe sent to your inbox, plus
new home-style recipes from An Amateur Cook every week.

This one started on a hot afternoon when I didn’t want to cook… didn’t want to bake… honestly didn’t even want to move much.

I just wanted something cold.

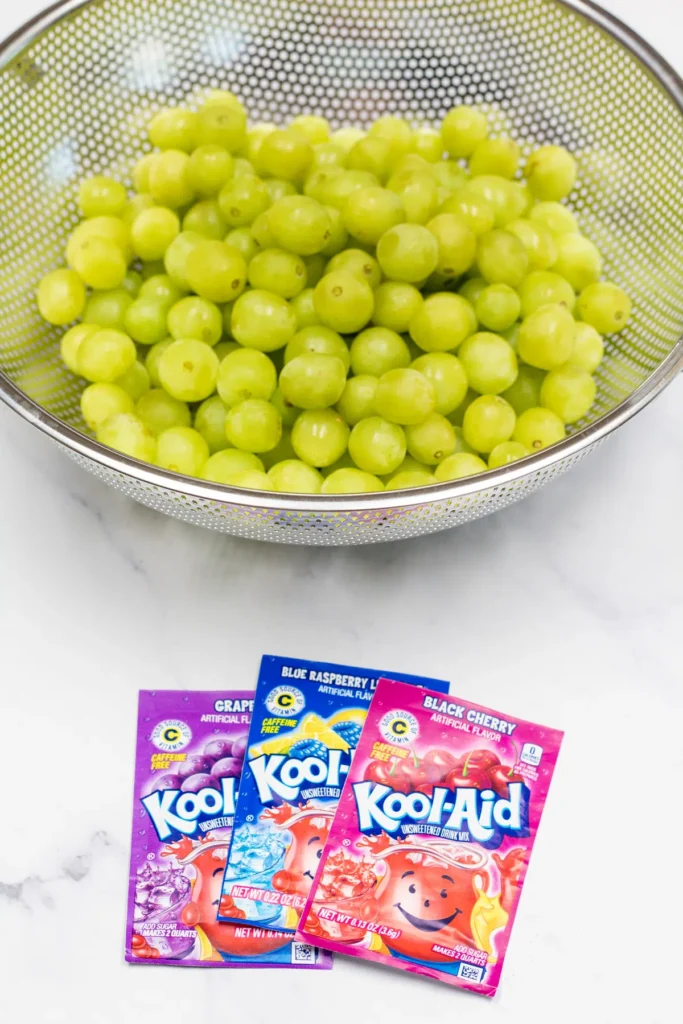
I opened the freezer hoping something magical would appear, but all I saw were frozen peas and an old ice tray. Not helpful. Then I spotted a bag of green grapes in the fridge.

Now, I’ve frozen grapes before. They’re good. But I remembered seeing something about coating them in flavored powder, and I thought… why not try it?

So I did.

I tossed them in some bright, sugary powder, froze them overnight, and the next day I pulled one out thinking it’d be “okay.”

It was not just okay.

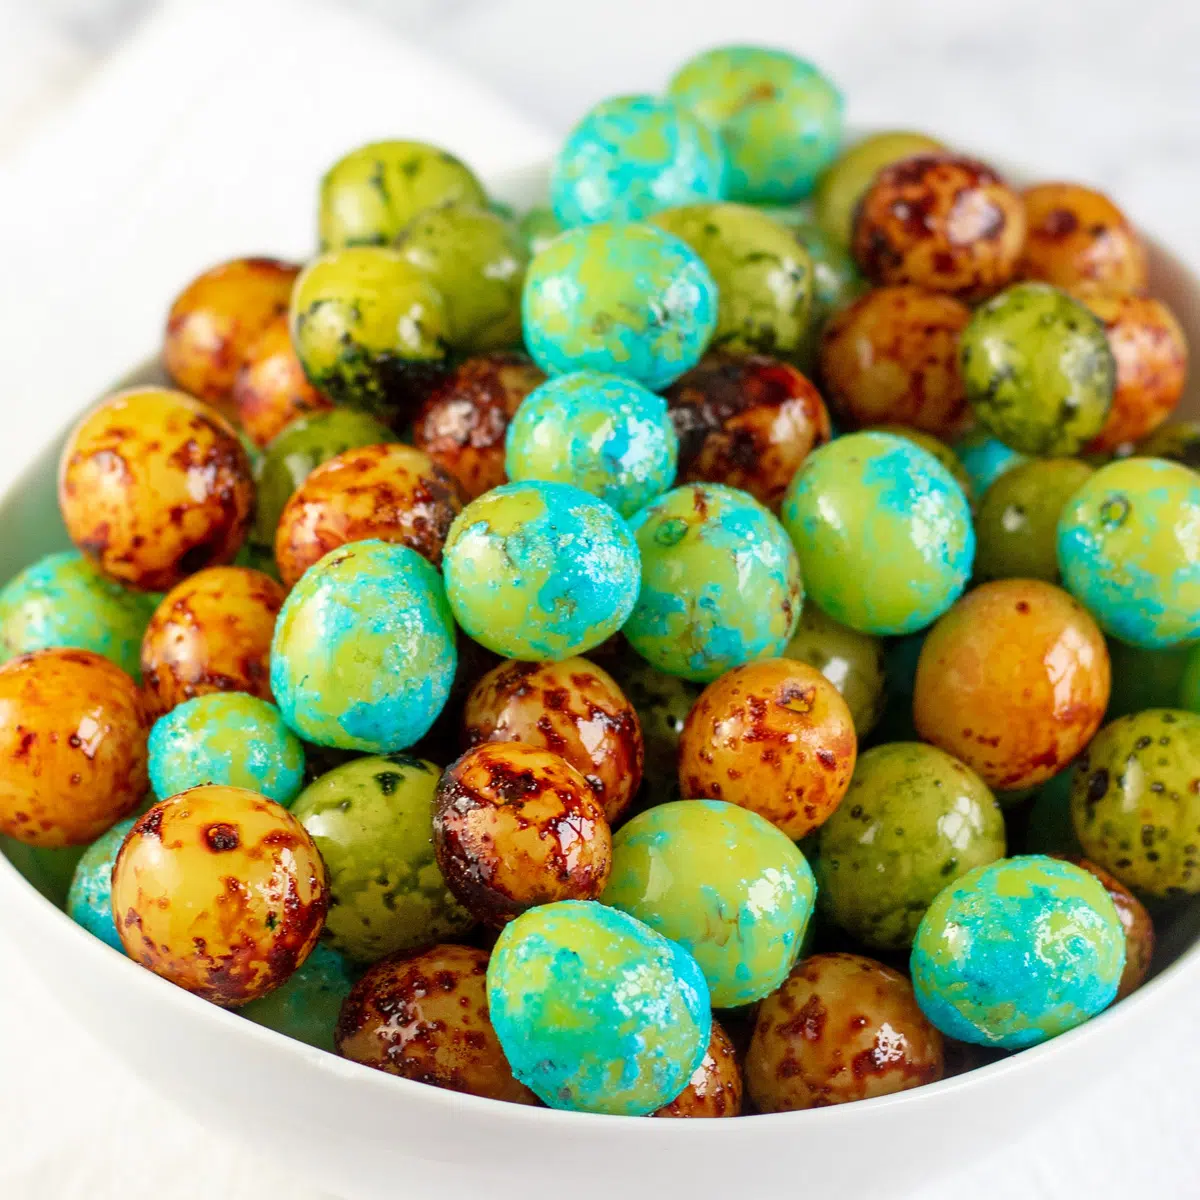
It was cold, crunchy on the outside, juicy inside, and tasted like some weird candy-fruit hybrid that I wasn’t mad about at all.

Now this is my go-to when I want something sweet, cold, and just a little fun without putting in real effort.

Why I Keep Coming Back to It

  • Cold and Refreshing: It’s like a mini frozen treat without needing ice cream.
  • Sweet Without Trying Too Hard: Feels like candy, but it’s still fruit… kind of a win.
  • Super Easy to Make: No cooking, no baking, just mix and freeze.
  • Fun to Eat: The texture is what gets me every time.
  • Custom Flavors: You can mix and match however you want.
  • Perfect for Hot Days: This is my summer survival snack.
  • Kid and Adult Approved: Everyone ends up grabbing more than they planned.

Real-Life Cooking Notes from Ethan

  1. Don’t Dry the Grapes Completely: A little moisture helps the powder stick better.
  2. Freeze Before De-Stemming: It makes removing stems way easier.
  3. Use Separate Bags for Flavors: Keeps colors and tastes from mixing too much.
  4. Shake Well: You want every grape coated evenly.
  5. Spread Them Out: Helps them freeze individually instead of clumping.
  6. Give Them Time: The full freeze makes a big difference in texture.
  7. Eat Straight from Freezer: They get messy once they thaw.
  8. Watch the Colors: Some flavors can stain fingers a bit.

Ingredients You’ll Need

  1. Green Grapes (Seedless): 2–3 lbs
  2. Kool-Aid Powder (Unsweetened): 6 oz (2–3 flavors)

How It Comes Together

Freeze the Grapes: Place grapes in the freezer for 1 hour.

Remove Stems: Twist stems off once slightly frozen.

Rinse Lightly: Wash grapes but don’t dry completely.

Bag Them Up: Divide grapes into ziplock bags.

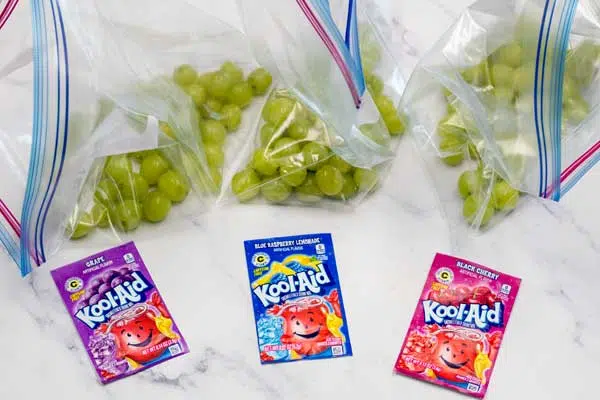
Add Powder: Pour Kool-Aid mix into each bag.

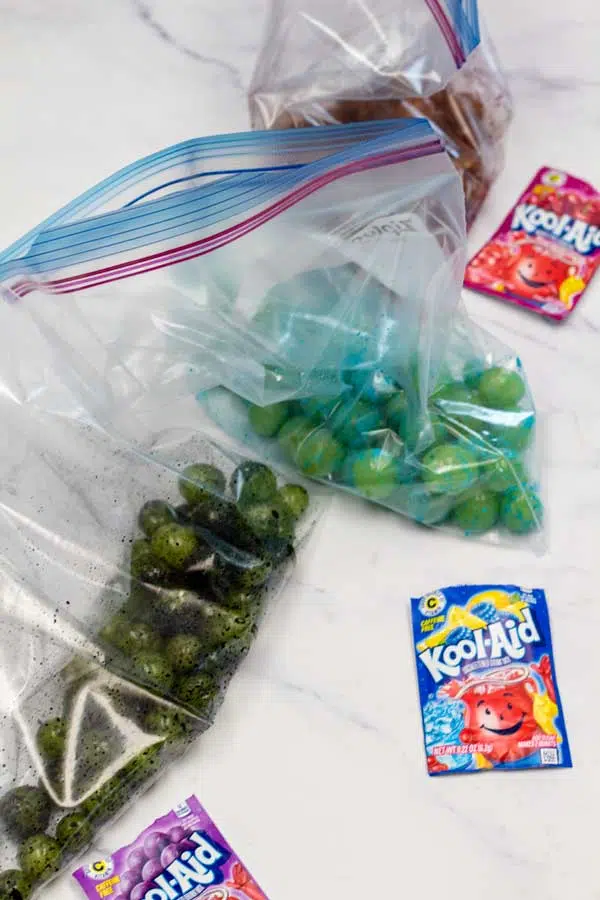
Shake to Coat: Toss until evenly covered.

Freeze Again: Spread on a tray and freeze for 24 hours.

Enjoy Frozen: Eat straight from the freezer.

Variations You Will Enjoy Trying

  • Sour Candy Style: Use extra tangy flavors for a punch.
  • Mixed Flavor Batch: Combine different powders in one bag.
  • Berry Blend: Try strawberry and raspberry together.
  • Citrus Kick: Lemon and orange flavors work great.
  • Less Sweet Version: Use lighter coating for a milder taste.
  • Rainbow Batch: Use multiple colors for a fun mix.

kool aid grapes

Fruity, tangy frozen grapes coated in vibrant Kool-Aid powder, creating a sweet, icy snack with bold flavor and refreshing crunch.
Prep Time 1 hour
Total Time 1 hour
Servings: 12
Course: Dessert
Cuisine: amerrican inspired
Calories: 120

Ingredients
  

  • 2 –3 lbs seedless green grapes
  • 6 oz unsweetened Kool-Aid powder 2–3 flavors
  • Equipment
  • Freezer
  • Ziplock bags
  • Baking tray
  • Colander or strainer
  • Paper towels (optiona

Equipment

  • Freezer
  • Ziplock bags
  • Baking tray
  • Colander or strainer
  • Paper towels (optional)

Method
 

  1. Place the grapes in the freezer for about 1 hour until slightly firm.
  2. Take the grapes out and twist off the stems once they are partially frozen.
  3. Rinse the grapes gently, leaving them slightly damp (do not dry completely).
  4. Divide the grapes evenly into ziplock bags.
  5. Add Kool-Aid powder to each bag.
  6. Seal the bags and shake well until the grapes are evenly coated.
  7. Spread the coated grapes onto a baking tray and freeze for 24 hours.
  8. Serve straight from the freezer for the best texture and flavor.

Nutritional Snapshot (Per Serving)

NutrientAmount
Calories~120
Carbohydrates~30g
Fat~0g
Protein~1g

Storage and Leftover Tips

  1. Keep Frozen: Store in an airtight container in the freezer.
  2. Good for Up to 1 Month: If they last that long.
  3. Don’t Let Them Thaw: They get sticky and messy.
  4. Separate Layers if Needed: Prevent clumping.
  5. Grab Small Portions: Avoid repeated thawing.

How I Like to Serve This Dish

  1. Straight from the Freezer: Best way, no question.
  2. In a Bowl for Snacking: Easy to grab and share.
  3. Movie Night Treat: Surprisingly addictive.
  4. Hot Day Snack: My go-to when it’s too warm outside.
  5. Quick Sweet Fix: When I want something but don’t want to cook.

FAQs

  1. Do I use sweetened Kool-Aid? No, use unsweetened powder.
  2. Can I use red grapes? Yes, but green gives a better tangy balance.
  3. Why not dry the grapes? Moisture helps the powder stick.
  4. Can I skip freezing first? It helps with coating and texture.
  5. Do they taste like candy? Pretty close, but fresher.
  6. Can I use other powders? You can experiment.
  7. Are they messy? A little, especially if thawed.
  8. Can I store them in the fridge? Not recommended, they need to stay frozen.

The Last Bite

This is one of those recipes that feels almost too simple to count… but then you try it, and suddenly you’re making it again the next day.

It’s cold, colorful, a little messy, and honestly just fun.

And sometimes, that’s exactly what you need.

Author Image

Ethan

I am a 28-year-old part-time barista, full-time vibe curator, and above all, an enthusiastic amateur cook living in Austin, Texas. .

Rate This Recipe

Thank you for rating! 🤍

Leave a Reply

Your email address will not be published. Required fields are marked *

Recipe Rating


PIN & SAVE

Follow on Pinterest

Craving more cozy, easy, and scroll-worthy recipes? Follow along and never lose a favorite again.

Follow Me on Pinterest →

You'll also love