Get this recipe sent to your inbox, plus
new home-style recipes from An Amateur Cook every week.
These lemon bars happened because I wanted “something light.” Which is funny, because I immediately added butter, sugar, and baked it into a dessert that is definitely not light… but feels like it is because lemons are involved.
I had a couple of lemons sitting around, slowly losing purpose, and I figured I should use them before they turned into regret. I didn’t want cake. Didn’t want cookies. Somehow landed on lemon bars like I had a plan all along.
The first time I made them, I was not prepared for how aggressively tangy they’d be. Like, wake-you-up kind of tangy. But then the buttery base balanced it out and suddenly I was cutting “just one more square” about five times in a row.
Now I make them whenever I want dessert that pretends to be refreshing.
Table of Contents
Why I Keep Making This Dish (Real Reasons)
Perfect Sweet-Tangy Balance: That lemon hit wakes you up in the best way.
Buttery Base Situation: The shortbread alone deserves respect.
Feels Lighter Than It Is: It’s dessert, but somehow doesn’t feel heavy.
Simple but Impressive: Looks neat and put-together with minimal effort.
Cut Into Squares = Control: In theory. In reality, I keep grabbing more.
Great for Sharing: Easy to serve, easy to disappear.
Lemon Lovers Win: If you like lemon, this is your thing.
Equipments Required
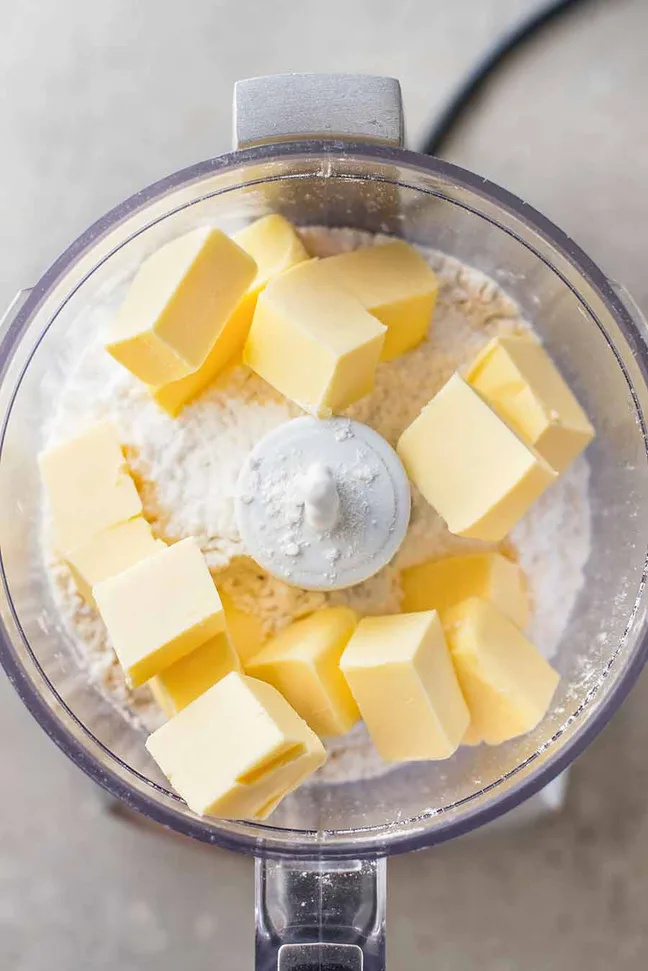
Food processor (or mixing bowl + hands)
8-inch square baking pan
Parchment paper
Mixing bowl
Whisk
Ingredients Required
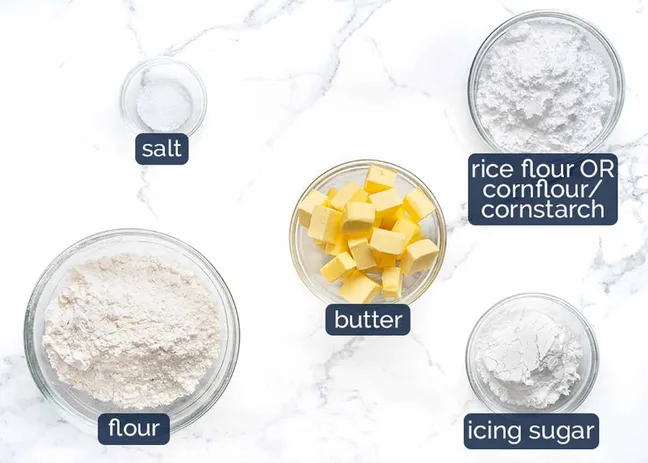
Shortbread Base
3/4 cup plain flour (all purpose flour)
1/4 cup rice flour (or cornstarch/cornflour)
1/2 cup icing sugar / powdered sugar, sifted
1/4 tsp salt
110g unsalted butter, cold, cubed
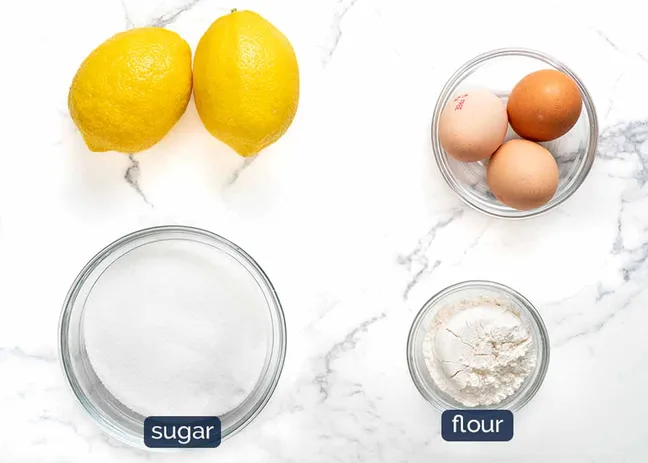
Lemon Curd Topping
3 large eggs
1 cup caster sugar / superfine sugar
2 tbsp plain flour
1 tbsp lemon zest
1/2 cup lemon juice
Instructions
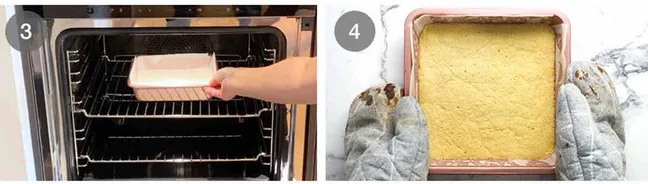
Step 1: Preheat oven: Set oven to 180°C/350°F and line your pan with parchment paper.
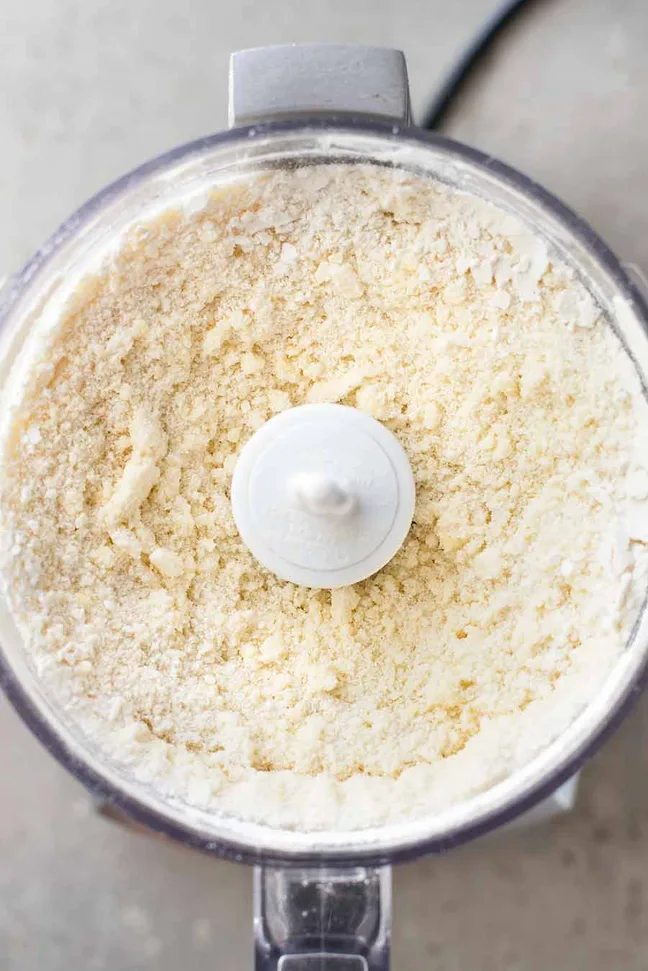
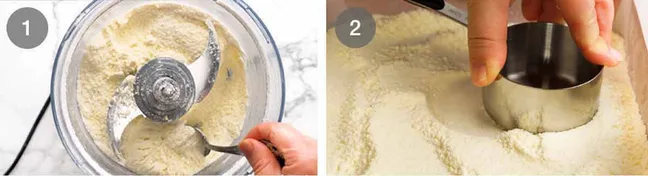
Step 2: Make the base: Blend flour, rice flour, sugar, salt, and butter until crumbly like sand.
Step 3: Press into pan: Pour mixture into the pan and press firmly into an even layer.
Step 4: Bake base: Bake for 20 minutes until lightly golden. Don’t let it cool after.
Step 5: Make lemon topping: While base bakes, whisk eggs, sugar, flour, lemon zest, and juice until smooth.
Step 6: Pour immediately: Pour lemon mixture over the hot base right out of the oven.
Step 7: Bake again: Bake for another 20 minutes until the top is set but still slightly soft.
Step 8: Cool down: Let it cool at room temp for 1 hour, then chill in the fridge for at least 2 hours.
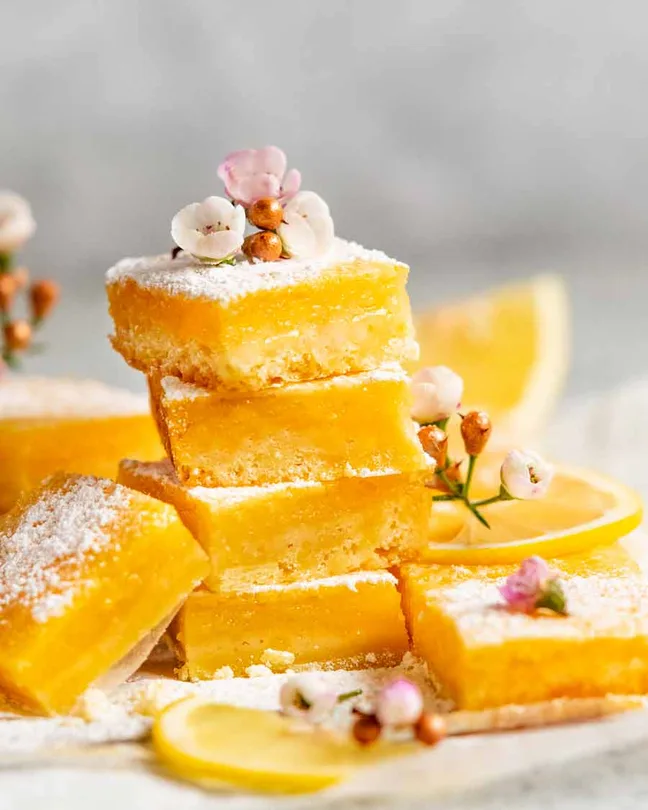
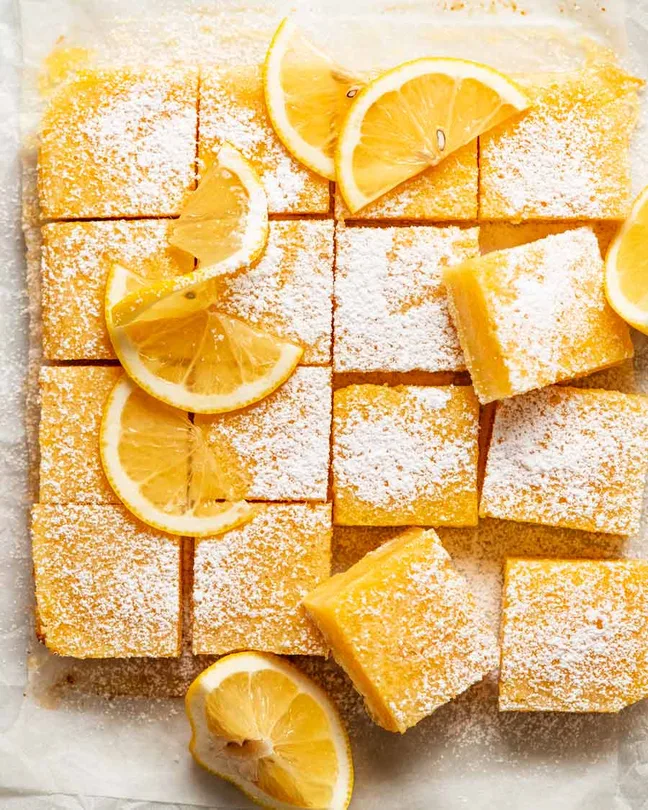
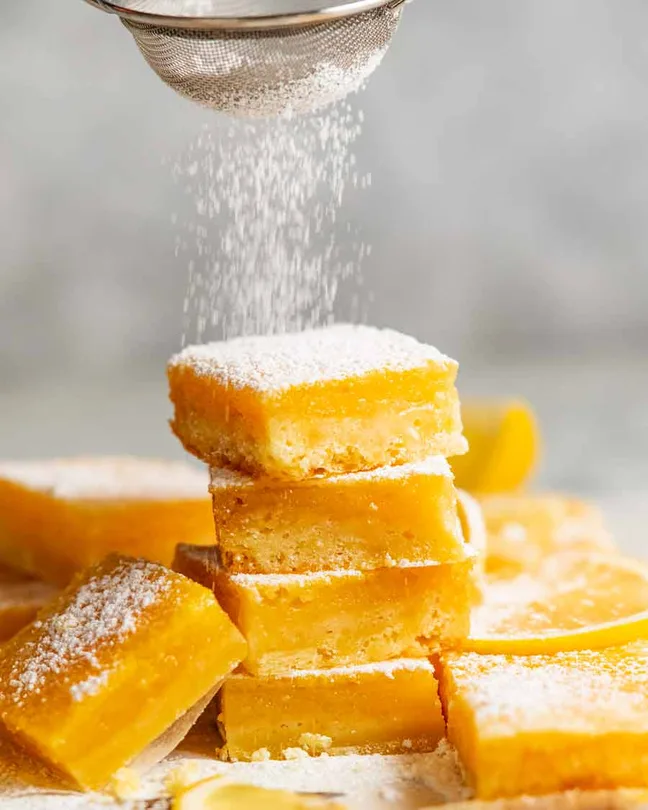
Step 9: Slice and serve: Cut into squares and dust with powdered sugar if you want that classic look.
Tips I Learned the Hard Way
Don’t Let the Base Cool: I tried once. The layers didn’t bond properly. Not ideal.
Use Cold Butter: Helps get that perfect crumbly base texture.
Zest Before Juicing: Learned this mid-recipe once. Not my best moment.
Don’t Overbake the Top: It should still have a slight softness.
Chill Properly: Warm lemon bars are messy. Good, but messy.
Press Base Firmly: Loose base = crumbly chaos when slicing.
Sharp Knife Helps: Clean cuts make them look way better.
lemonade bars
Buttery shortbread topped with a tangy lemon curd layer. Bright, sweet, and refreshing with a soft, melt-in-your-mouth texture.
Step 1: Preheat oven: Set oven to 180°C/350°F and line your pan with parchment paper.
Step 2: Make the base: Blend flour, rice flour, sugar, salt, and butter until crumbly like sand.
Step 3: Press into pan: Pour mixture into the pan and press firmly into an even layer.
Step 4: Bake base: Bake for 20 minutes until lightly golden. Don’t let it cool after.
Step 5: Make lemon topping: While base bakes, whisk eggs, sugar, flour, lemon zest, and juice until smooth.
Step 6: Pour immediately: Pour lemon mixture over the hot base right out of the oven.
Step 7: Bake again: Bake for another 20 minutes until the top is set but still slightly soft.
Step 8: Cool down: Let it cool at room temp for 1 hour, then chill in the fridge for at least 2 hours.
Step 9: Slice and serve: Cut into squares and dust with powdered sugar if you want that classic look.
Variations You Can Mess Around With
Extra Tangy: Add more lemon juice or zest. Bold move, but worth it.
Berry Layer: Add raspberries or blueberries into the topping.
Coconut Twist: Add a little shredded coconut to the base.
Thicker Base: Increase base slightly if you like more crunch.
Less Sweet Version: Reduce sugar slightly for sharper flavor.
Lime Swap: Use lime instead of lemon for a different vibe.
Gluten-Free Version: Use full rice flour or gluten-free flour mix.
How I Like to Serve This
Chilled Squares: Straight from the fridge, clean and firm.
Afternoon Snack: With tea or coffee, feels balanced somehow.
With Friends: Easy to pass around and share.
After Dinner Dessert: Light enough to not feel too heavy.
Sneaky Second Piece: Happens every time.
Dust of Sugar: Makes it look like I tried harder than I did.
Storage, Leftovers, and Next-Day Thoughts
Fridge Storage: Keeps well for 4–5 days.
Cover Properly: Prevents drying out.
Best Served Cold: Texture is better chilled.
Freezing Works: You can freeze and thaw when needed.
Flavor Gets Better: Lemon settles and balances over time.
Stack Carefully: They’re soft, don’t squish them.
FAQs (Real Questions People Actually Ask)
Can I use bottled lemon juice? You can, but fresh is way better. Big difference.
Why is my topping runny? Probably underbaked or not chilled enough.
Can I make it ahead of time? Yes, it’s actually better that way.
Do I have to chill it? Technically no… but you should. Trust me.
Why did my base crumble? Not pressed firmly enough or cut too soon.
Can I reduce sugar? A little, but it balances the lemon, so be careful.
How do I get clean slices? Chill fully and use a sharp knife.
Is it supposed to be this tangy? Yep. That’s the whole point.
The Last Bite
These lemon bars are the kind of dessert that feel simple but hit way harder than expected.
They’re a little messy, a little tangy, and very easy to keep eating without realizing how many squares you’ve had. Not that I’m speaking from experience or anything.


Leave a Reply