Save this recipe!
Get this recipe sent to your inbox, plus
new home-style recipes from An Amateur Cook every week.
Get this recipe sent to your inbox, plus
new home-style recipes from An Amateur Cook every week.
I used to be the person who bought pie crust from the store and felt absolutely zero guilt about it.
And honestly, I still think there’s no shame in that game. Store-bought crust has saved many of my baking adventures from total disaster. But one quiet Saturday afternoon, standing in my kitchen with a bag of apples and a little too much curiosity, I thought… what if I just tried making my own?
No pressure. No audience. Just flour, butter, and the hope that I wouldn’t end up with something resembling edible cement.
The first attempt? Let’s just say it wasn’t bakery-window material. It was uneven, a little rough around the edges, and I probably used more flour than necessary trying to roll it out.
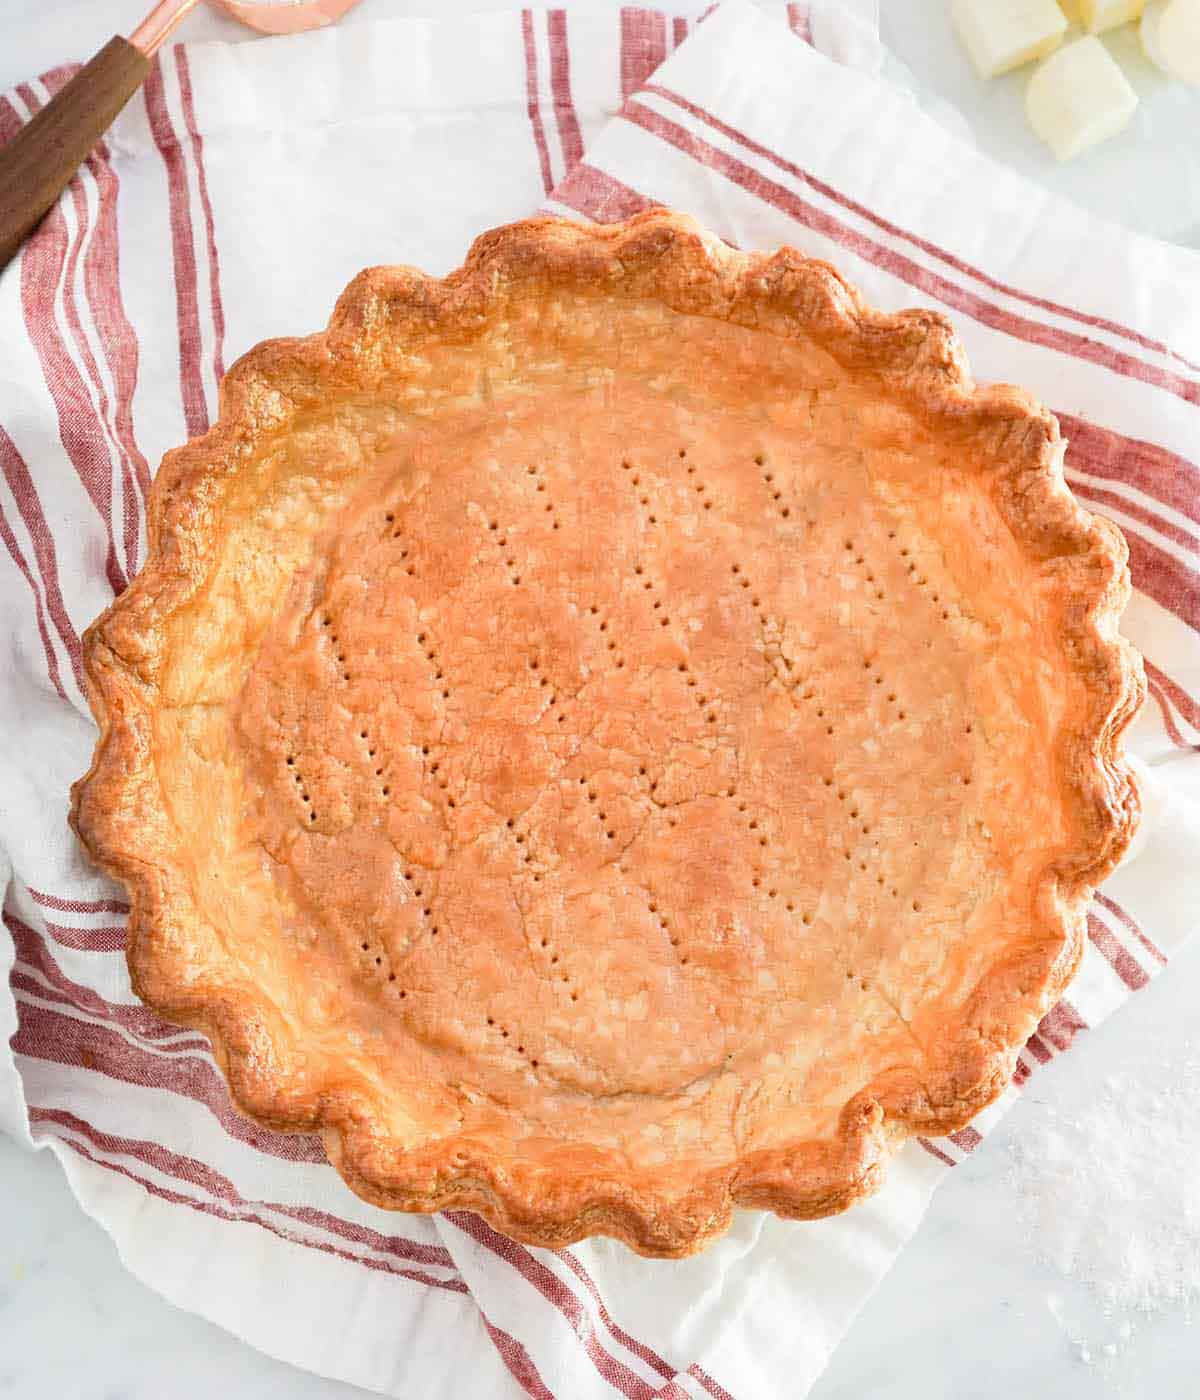
But when that pie came out of the oven, something magical happened. The crust was buttery, flaky, and tasted like it belonged there. Not perfect, but honest.
That’s when I realized homemade pie crust isn’t about perfection. It’s about that quiet moment when butter and flour turn into something that makes the whole kitchen smell like comfort.
And now, every time I make it, it feels a little like shaking hands with tradition… even if my edges are still a little crooked.
Step 1: In the bowl of a food processor, combine 1½ cups of the flour, sugar, and salt. Pulse a few times just to mix everything together.
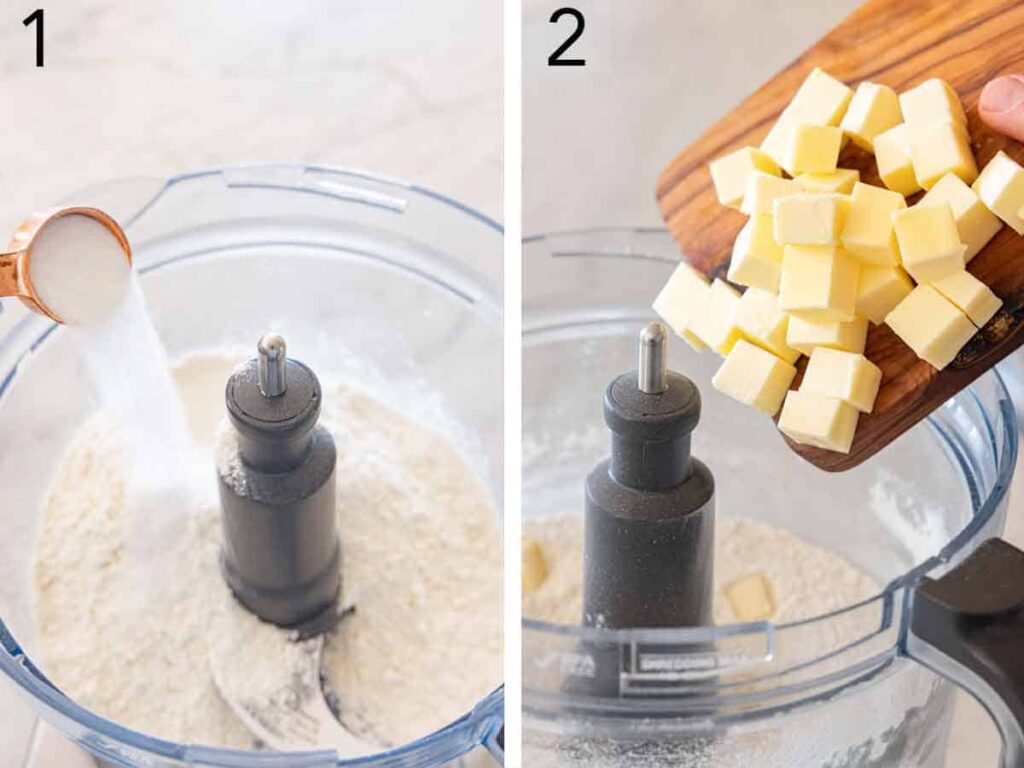
Step 2: Add half of the butter cubes. Process for about 30 seconds until the mixture looks crumbly and begins forming small clumps.
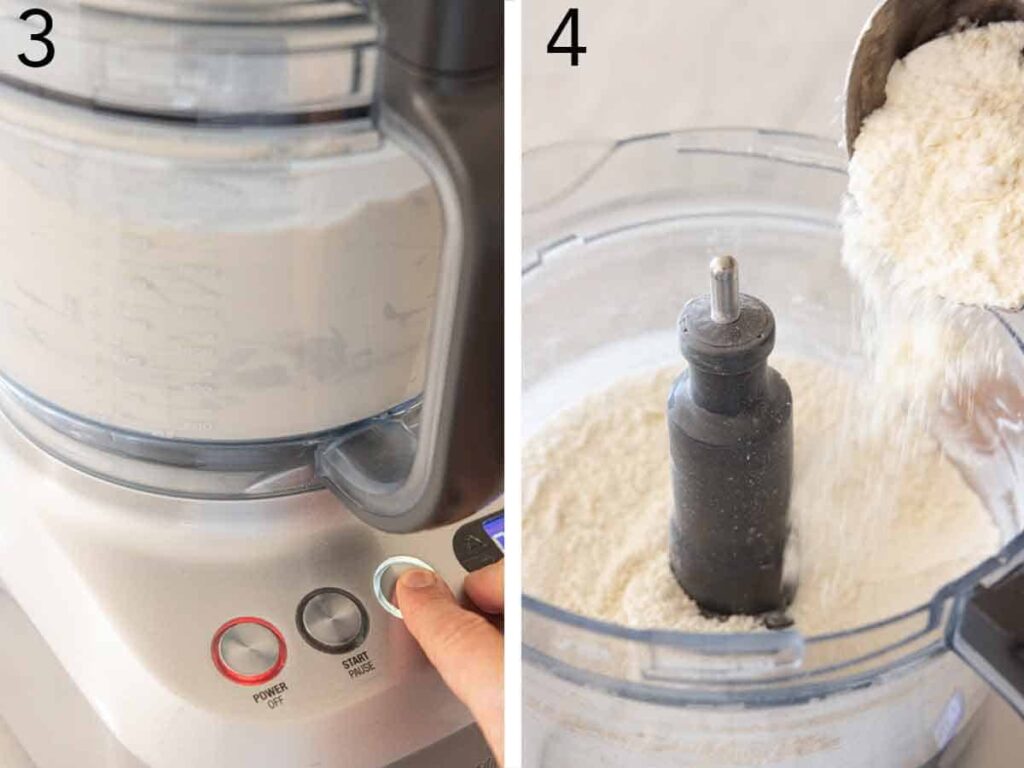
Step 3: Scatter in the remaining butter and the remaining 1½ cups of flour. Pulse just twice to distribute the butter.
Step 4: Drizzle 4 tablespoons of ice water over the mixture. Pulse a few times to combine.
Step 5: Add more ice water, one tablespoon at a time, pulsing once or twice after each addition until the dough holds together when squeezed.
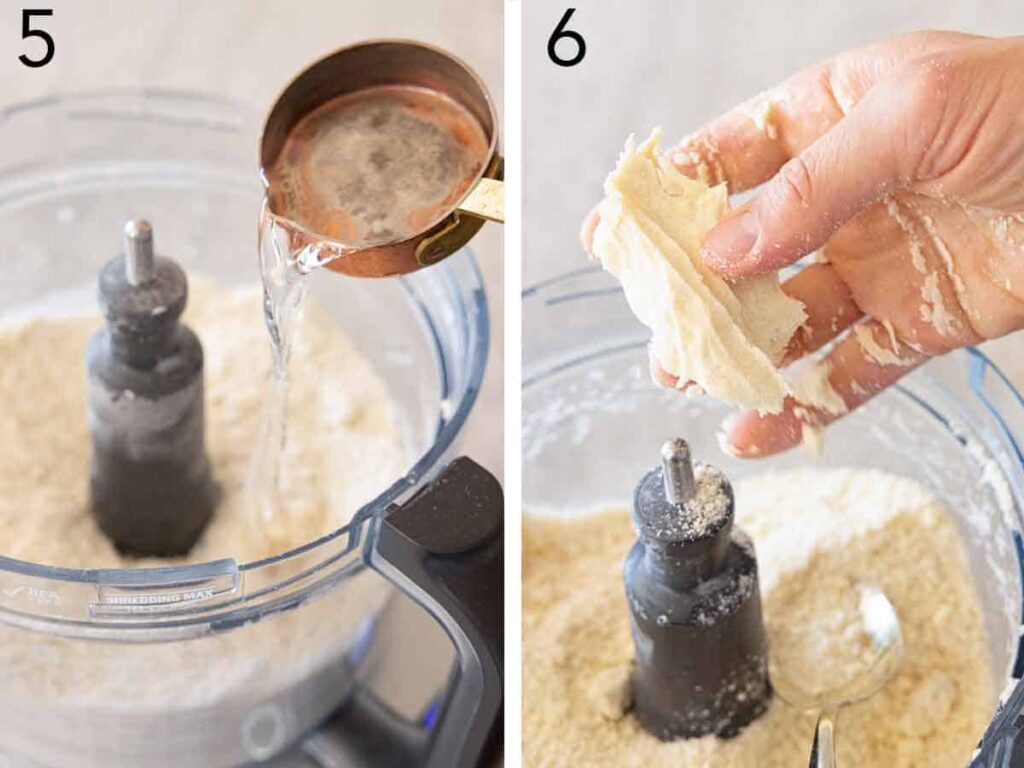
Step 6: Turn the dough onto the counter and gently form it into a ball.
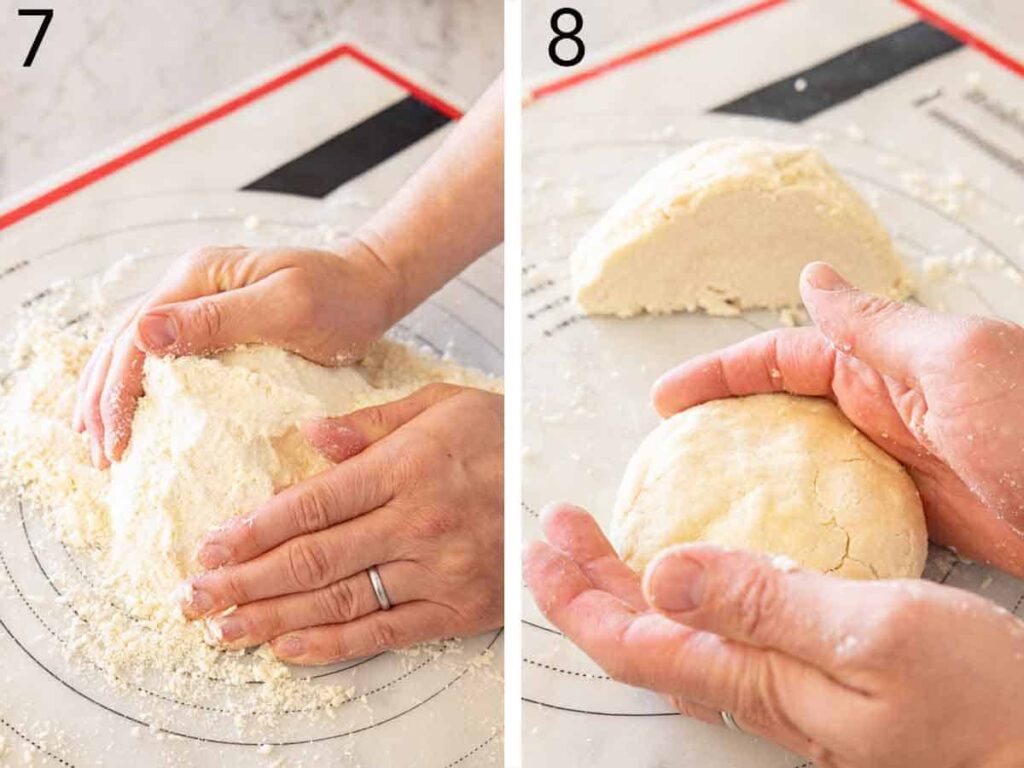
Step 7: Cut the dough in half and press each half into a flat disc.
Step 8: Wrap each disc tightly in plastic wrap and refrigerate for at least 1 hour before using.
| Nutrition | Value |
|---|---|
| Calories | 1519 kcal |
| Carbohydrates | 150 gm |
| Fat | 100 gm |
| Protein | 18 gm |
Yes. You can cut the butter into the flour using a pastry cutter or even two forks.
It might be too cold. Let it sit on the counter for a few minutes.
Yes, just reduce the added salt slightly.
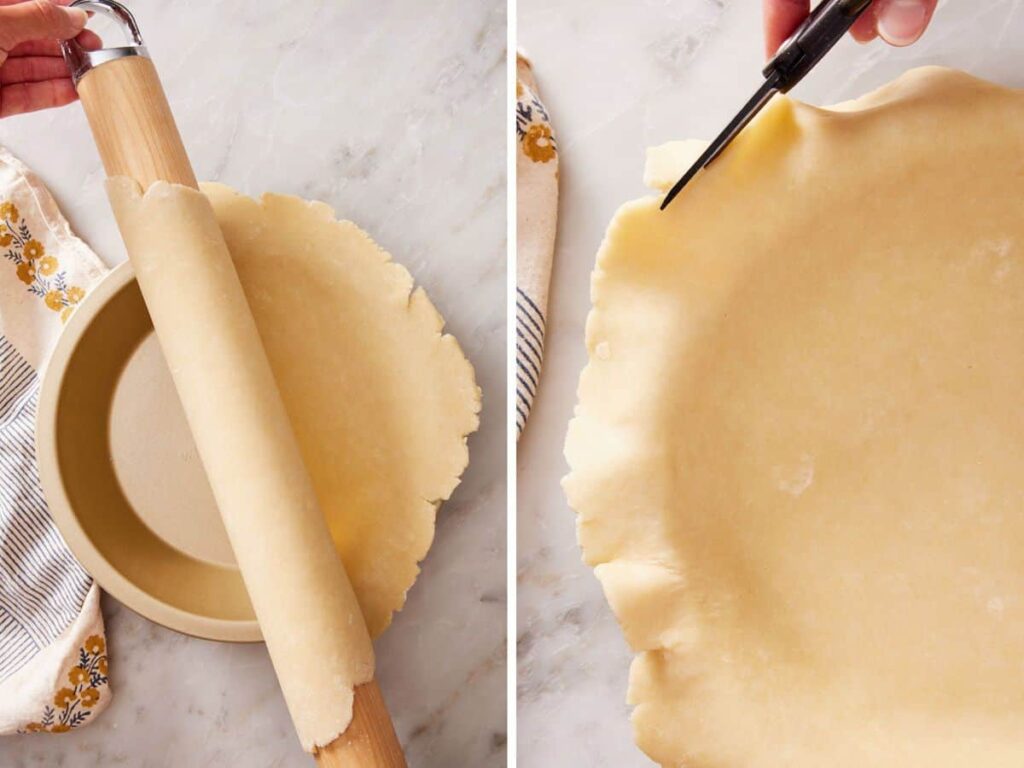
About ⅛ inch thick works well for most pies.
Chilling relaxes the gluten and keeps the butter solid, which creates flaky layers.
Absolutely. My first one looked rough, but it still tasted fantastic.
Yes, and I actually recommend it so you always have extra dough ready.
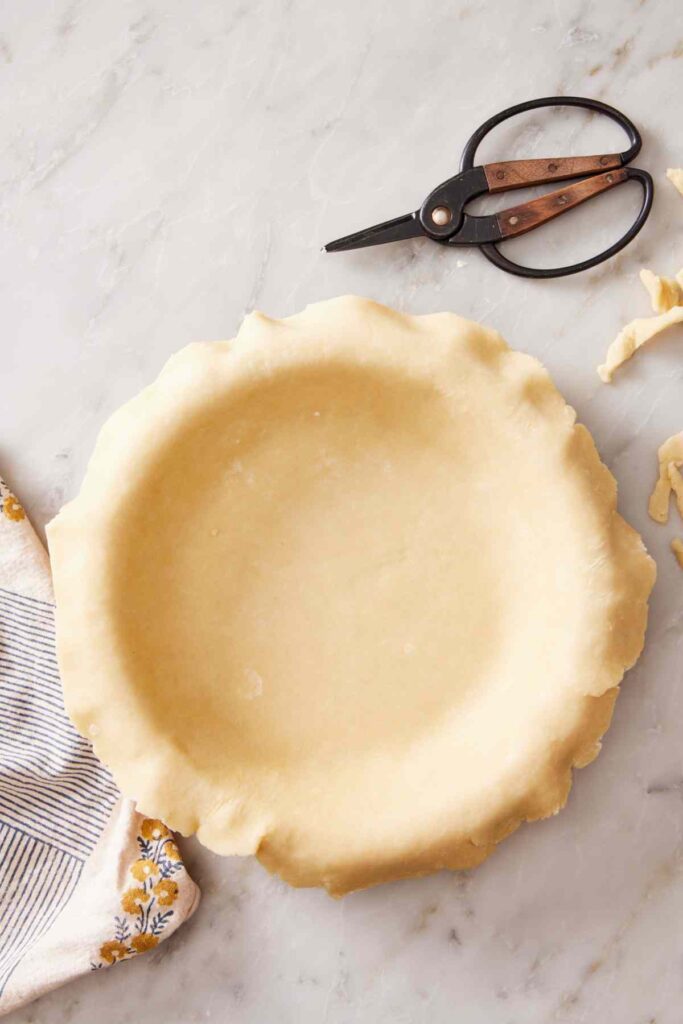
Almost any pie. Fruit pies, cream pies, pot pies, or quiches.
Homemade pie crust used to intimidate me. Now it feels like one of those small kitchen skills that makes baking more personal.
It’s flour on the counter, butter on your fingers, and the quiet satisfaction of making something from scratch.
And if your crust comes out a little uneven like mine usually does, just remember this.
Pie doesn’t need perfect edges to taste amazing.

Craving more cozy, easy, and scroll-worthy recipes? Follow along and never lose a favorite again.
Follow Me on Pinterest →
A 28-year-old part-time barista, full-time vibe curator, and above all, an enthusiastic amateur cook living in Austin, Texas.
This whole adventure began with a bowl of very confused guacamole.
Two summers ago, I brought my now-legendary “honey-guac” to a friend’s backyard party. It was… a character-building experience.
A single bite earned me a gentle pat on the hand from my friend’s abuela and the realization that some souls are meant to enjoy food, not make it.
But instead of fading into the background, I leaned in. I laughed at the mess and decided to document the whole beautiful, blundering journey.
That’s how An Amateur Cook was born. Here, “amateur” isn’t a disclaimer. It’s the whole point.
Get exclusive access to recipes and cooking tips!


Leave a Reply