Red Velvet Cake Recipe

An Amateur Cook – Save Recipe

Save this recipe!

Get this recipe sent to your inbox, plus
new home-style recipes from An Amateur Cook every week.

I didn’t grow up baking layered cakes.

I grew up eating them… usually at birthdays, usually the kind where the frosting was a little too sweet and the slices were a little too big, and nobody really complained about either.

So when I first tried making this red velvet cake, it wasn’t for a special occasion. It was one of those “what if I try something that feels like a celebration… even if today isn’t one?” kind of days.

Also, I had leftover cream cheese in the fridge that was dangerously close to being forgotten forever.

I’ll be honest, I expected it to go sideways. Layer cakes feel like they belong to people who know what they’re doing.

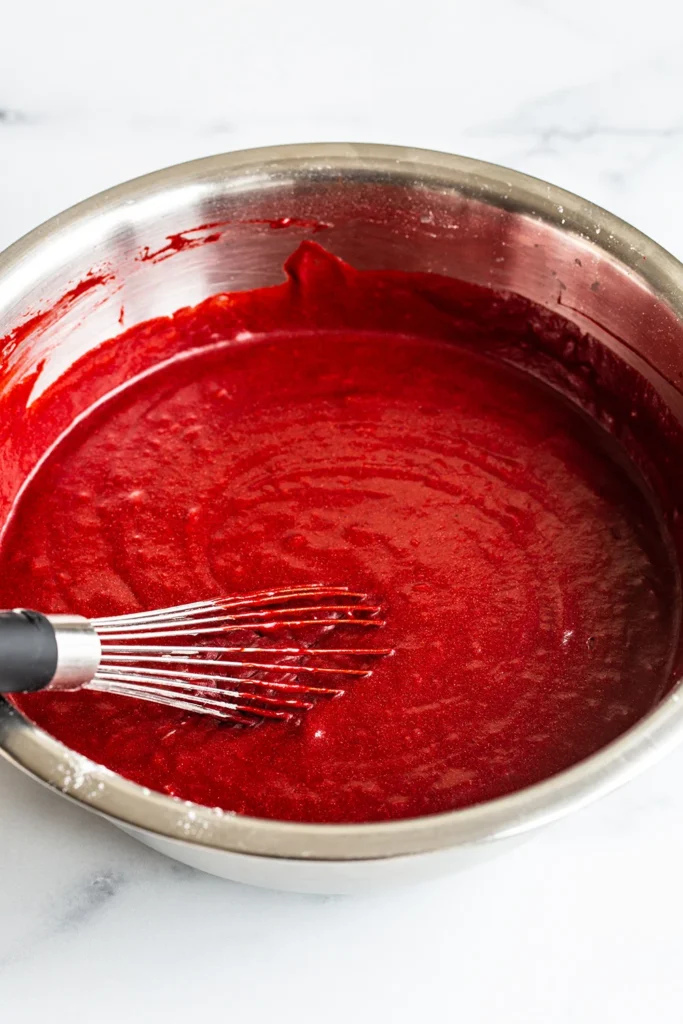
But somewhere between whisking cocoa into hot coffee and watching those deep red layers come out of the oven, I realized this wasn’t about getting it perfect.

It was about showing up, making a mess, and ending up with something that feels a little special.

Now this cake is my go-to when I want to pretend I’ve got my life together… even if I’m just baking in sweatpants.

Why I Keep Coming Back to It

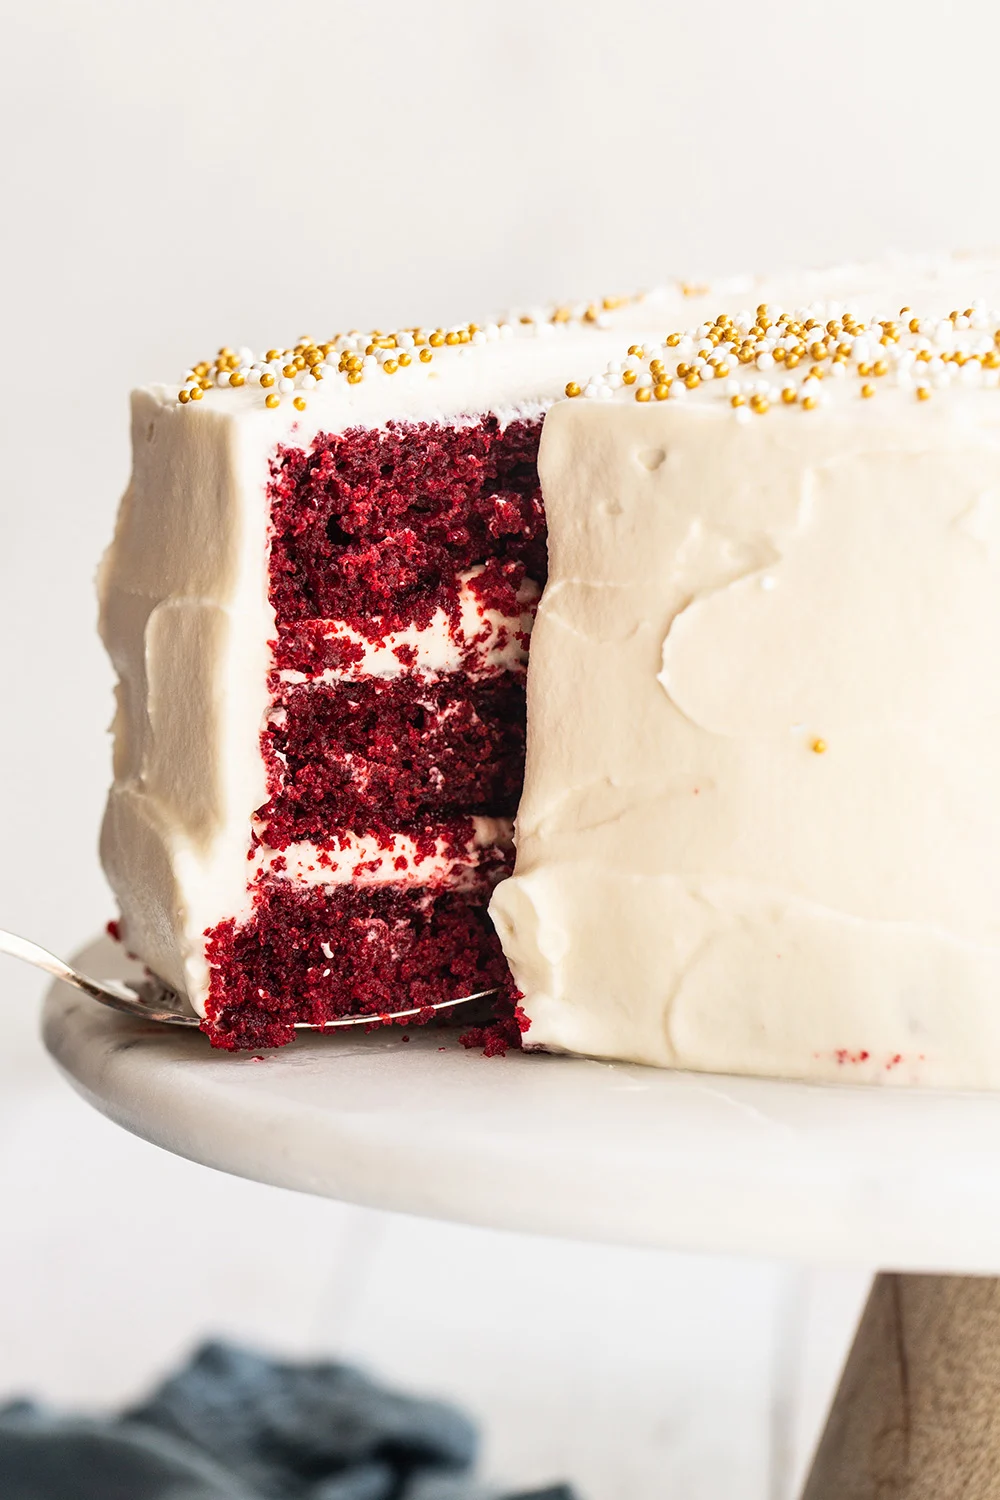
  • That Soft, Velvety Texture: It’s not just a name, it actually feels like it.
  • Perfect Balance of Flavors: Slightly chocolatey, slightly tangy, not overly sweet.
  • The Frosting Is Everything: Cream cheese frosting deserves its own fan club.
  • Feels Like an Occasion: Even when it’s just a regular Tuesday.
  • Surprisingly Doable: Looks impressive, but it’s not complicated.
  • Crowd Favorite: This one disappears fast.
  • Worth the Effort: And honestly, it’s not even that much effort.

Real-Life Cooking Notes from Ethan

  1. Coffee Makes a Difference: You won’t taste it, but it deepens the chocolate flavor.
  2. Room Temperature Ingredients Matter: Things mix smoother, no weird lumps.
  3. Don’t Overmix the Batter: Keeps the cake soft, not dense.
  4. Sift the Dry Ingredients: I used to skip this. I don’t anymore.
  5. Tap the Pans Before Baking: Gets rid of air bubbles.
  6. Let Cakes Cool Completely: Warm cake + frosting = a slippery disaster.
  7. Chill Before Final Frosting (Optional): Makes layering easier.
  8. Taste the Frosting: Adjust sweetness if needed.

Ingredients You’ll Need

For the Cake

  1. Hot Coffee or Water: ½ cup
  2. Cocoa Powder: ¼ cup
  3. All-Purpose Flour: 2¼ cups
  4. Baking Powder: ½ teaspoon
  5. Baking Soda: 1 teaspoon
  6. Salt: 1 teaspoon
  7. Cinnamon (Optional): ¼ teaspoon
  8. Sugar: 2 cups
  9. Vegetable Oil: ½ cup
  10. Butter (Melted): 1 stick
  11. Eggs: 2 large + 1 yolk
  12. Buttermilk: 1 cup
  13. Vanilla Extract: 2 teaspoons
  14. Red Food Coloring: 3 teaspoons
  15. White Vinegar: 1 teaspoon

For the Cream Cheese Frosting

  1. Cream Cheese: 16 ounces
  2. Butter: 2 sticks
  3. Vanilla Extract: 2 teaspoons
  4. Powdered Sugar: 4 cups

How It Comes Together

Preheat Oven: 325°F (165°C) and prep pans.

Mix Cocoa + Coffee: Let it sit briefly.

Combine Dry Ingredients: Flour, baking powder, soda, salt.

Mix Wet Ingredients: Sugar, oil, butter, eggs, buttermilk, vanilla, coloring.

Add Vinegar + Cocoa Mix: Stir together.

Add Dry Ingredients Gradually: Mix until just combined.

Divide Batter: Into pans evenly.

Bake: 25–30 minutes.

Quick Baking Check

  • Toothpick should come out clean
  • Cakes should spring back slightly
  • Edges pull away from pan

  1. Cool Completely: On racks.
  2. Make Frosting: Beat cream cheese and butter, add sugar and vanilla.

Frosting Consistency Tip

  • Too thick → add a splash of milk
  • Too thin → add more powdered sugar

  1. Assemble Layers: Frost between each layer.
  2. Finish Frosting: Cover entire cake.

Variations You Will Enjoy Trying

  1. Cupcake Version: Same batter, easier serving.
  2. Chocolate Boost: Add chocolate chips.
  3. Less Sweet Frosting: Reduce powdered sugar slightly.
  4. Layer with Fruit: Strawberries work beautifully.
  5. Mini Cake: Cut recipe in half.
  6. Naked Cake Style: Less frosting, more rustic.

Red Velvet Cake Recipe

Rich and moist red velvet cake with cocoa notes, vibrant color, and creamy tangy frosting, perfect for celebrations and special occasions.
Prep Time 15 minutes
Cook Time 40 minutes
Total Time 55 minutes
Servings: 12
Course: Dessert
Cuisine: American
Calories: 520

Ingredients
  

  • For the Cake
  • ½ cup hot coffee or water
  • ¼ cup cocoa powder
  • cups all-purpose flour
  • ½ teaspoon baking powder
  • 1 teaspoon baking soda
  • 1 teaspoon salt
  • ¼ teaspoon cinnamon optional
  • 2 cups sugar
  • ½ cup vegetable oil
  • 1 stick butter melted
  • 2 large eggs + 1 yolk
  • 1 cup buttermilk
  • 2 teaspoons vanilla extract
  • 3 teaspoons red food coloring
  • 1 teaspoon white vinegar
  • For the Cream Cheese Frosting
  • 16 ounces cream cheese
  • 2 sticks butter
  • 2 teaspoons vanilla extract
  • 4 cups powdered sugar

Equipment

  • Mixing bowls
  • Electric mixer or whisk
  • Spatula
  • Whisk
  • Measuring cups and spoons
  • Cooling rack

Method
 

  1. Preheat the Oven
  2. Preheat the oven to 325°F (165°C) and prepare the cake pans.
  3. Mix Cocoa + Coffee
  4. In a small bowl, combine the cocoa powder with hot coffee or water. Let it sit briefly.
  5. Combine Dry Ingredients
  6. In a separate bowl, mix the flour, baking powder, baking soda, salt, and optional cinnamon.
  7. Mix Wet Ingredients
  8. In a large bowl, combine the sugar, vegetable oil, melted butter, eggs, egg yolk, buttermilk, vanilla extract, and red food coloring.
  9. Add Vinegar + Cocoa Mix
  10. Stir in the vinegar and the prepared cocoa mixture until combined.
  11. Add Dry Ingredients Gradually
  12. Gradually add the dry ingredients to the wet mixture, mixing until just combined.
  13. Divide Batter
  14. Evenly divide the batter between the prepared cake pans.
  15. Bake
  16. Bake for 25–30 minutes, or until the cakes are set.
  17. Course: Dessert
  18. Cuisine: American

Nutritional Snapshot (Per Serving)

NutrientAmount
Calories~520
Carbohydrates~65g
Fat~26g
Protein~6g

Storage and Leftover Tips

  • Refrigerate the Cake: Especially because of the frosting.
  • Bring to Room Temp Before Serving: Tastes better.
  • Store Covered: Prevents drying out.
  • Freezes Well: Wrap slices individually.
  • Don’t Leave Out Too Long: Cream cheese needs care.

How I Like to Serve This Dish

  1. With Coffee: Classic pairing.
  2. Slightly Chilled: Frosting holds better.
  3. With Fresh Berries: Adds freshness.
  4. Big Generous Slice: No tiny portions here.
  5. Shared (or Not): Depends on the day.

FAQs

  • Does it taste like chocolate? Slightly, not like a chocolate cake.
  • Can I skip the food coloring? Yes, but it won’t be red velvet.
  • Why add vinegar? It reacts with baking soda for softness.
  • Can I use natural yogurt instead of buttermilk? Yes, it works.
  • Why is my cake dry? Likely overbaked.
  • Can I make it ahead? Absolutely, even better the next day.
  • Can I use a hand mixer? Yes, works perfectly fine.
  • Do I need three pans? You can bake in batches.

The Last Bite

This cake isn’t about perfection.

It’s about that moment when you slice into it, see those layers, and think… “okay, I actually made this.”

And if the frosting’s a little uneven or the layers lean a bit?

Honestly, that just makes it feel more like mine.

Author Image

Ethan

I am a 28-year-old part-time barista, full-time vibe curator, and above all, an enthusiastic amateur cook living in Austin, Texas. .

Rate This Recipe

Thank you for rating! 🤍

Leave a Reply

Your email address will not be published. Required fields are marked *

Recipe Rating


PIN & SAVE

Follow on Pinterest

Craving more cozy, easy, and scroll-worthy recipes? Follow along and never lose a favorite again.

Follow Me on Pinterest →

You'll also love